
This shop has been compensated by Collective Bias, Inc. and its advertiser.
All opinions are mine alone. #SoHoppinGood #BlueBunny #BombPop

For a few summers now, I’ve wanted to make another ice cream cookie sandwich. When I had the opportunity to work with Blue Bunny®, I jumped at the chance and created these Peanut Butter Ice Cream Sandwiches!
Blue Bunny® has been has been bringing playfulness to any occasion with their delicious ice cream made with fun, fresh ingredients for more than 80 years! Yum!
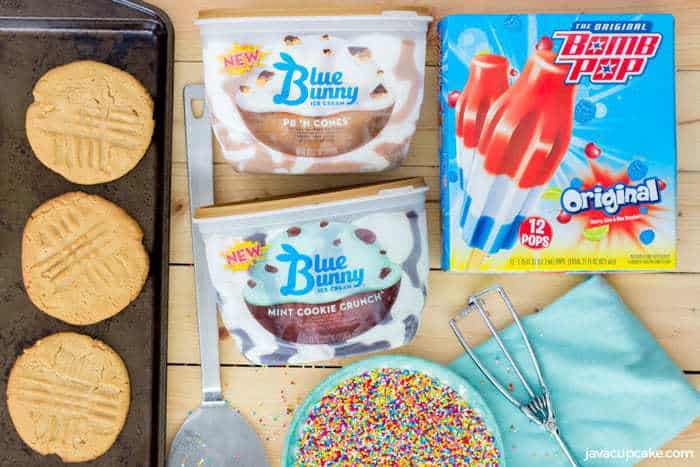
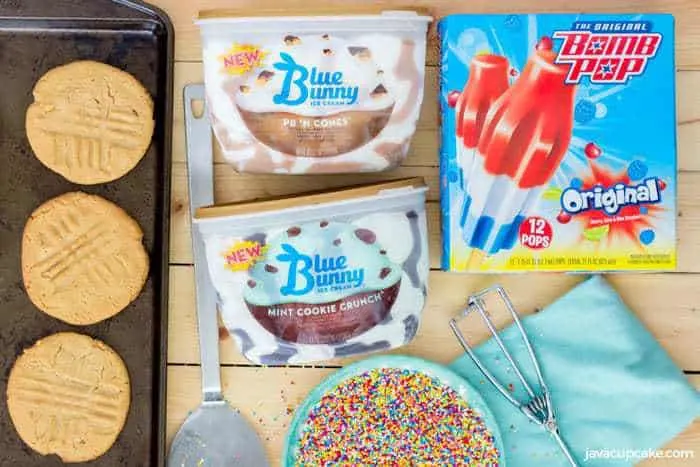
Since ice cream sandwiches are a bit messy, I’ve made them for the grown-ups and also purchased a box of The Original Bomb Pop® pops.
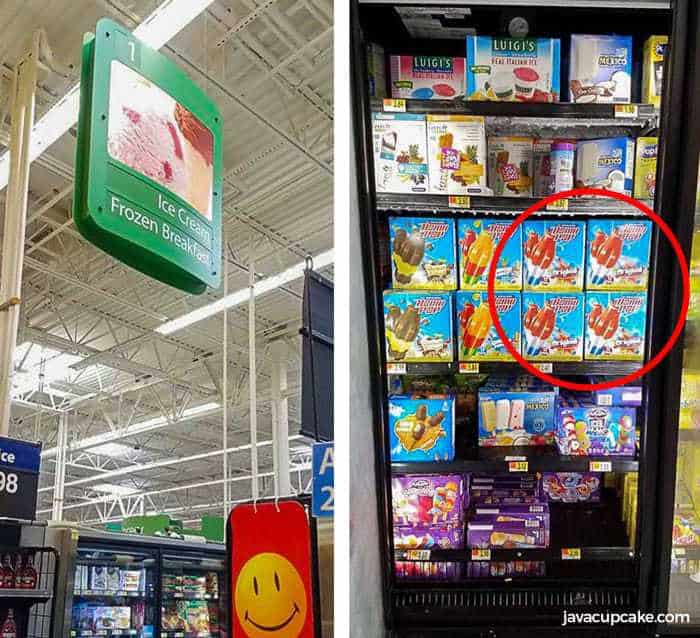
Blue Bunny® has a variety of new flavors this season including Blue Bunny® Mint Cookie Crunch and Blue Bunny® PB ‘N Cone™, the two I bought! You can find these Blue Bunny® and The Original Bomb Pop® flavors at your local Walmart on aisle 1!

Putting together these Peanut Butter Ice Cream Sandwiches took no time at all! I used one of my tried and true peanut butter cookie recipes to make the cookies.
These cookies are firm and firm, yet still soft enough to taste a bit of chew when you bite into them. They hold up really well with the Blue Bunny® ice cream.
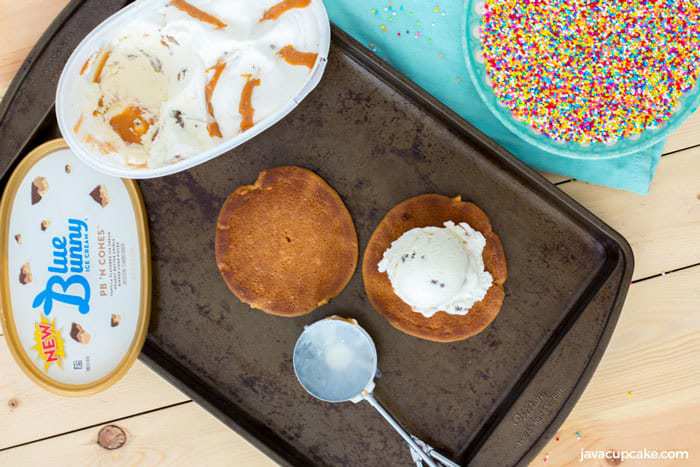
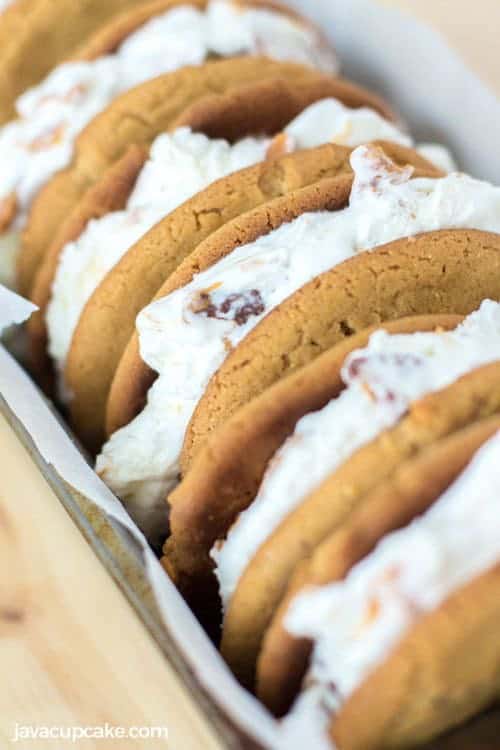
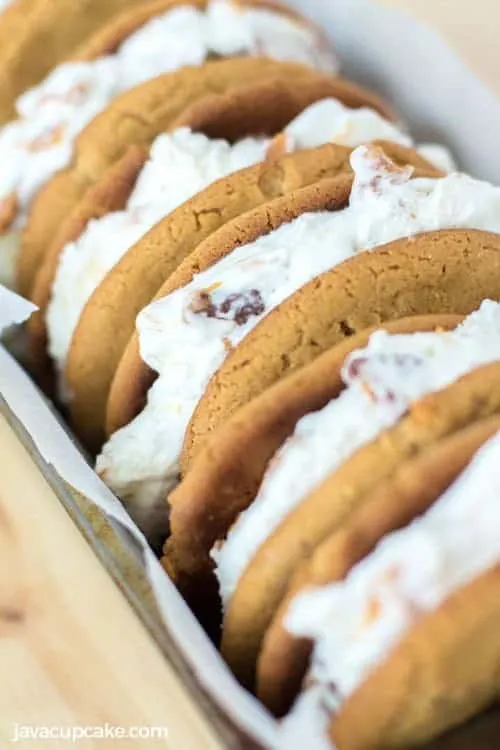
 Then I placed a big scoop of Blue Bunny® PB ‘N Cone™ in between two cookies and squeezed just until the ice cream came to the edge.
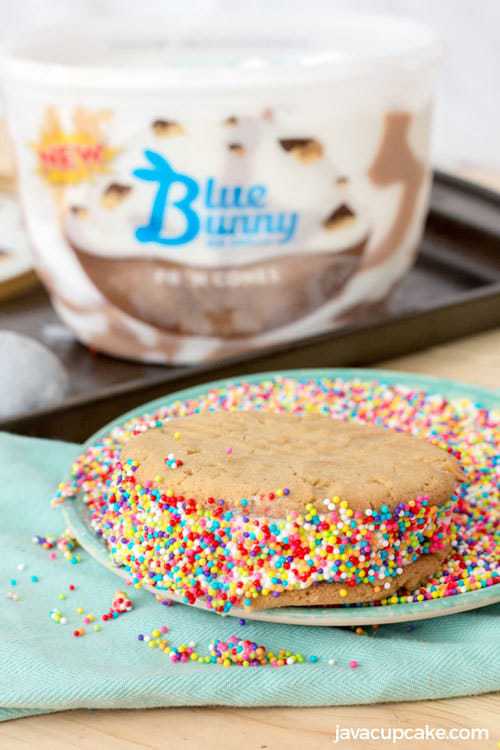
A few of the peanut butter ice cream sandwiches I even rolled in sprinkles. Because let’s be honest here… everything is better with sprinkles!

After the ice cream sandwiches were all assembled, I popped them back in the freezer to set. The great thing about this type of dessert is that you can make it ahead and pull it out of the freezer when you need it!
I love make-ahead desserts!
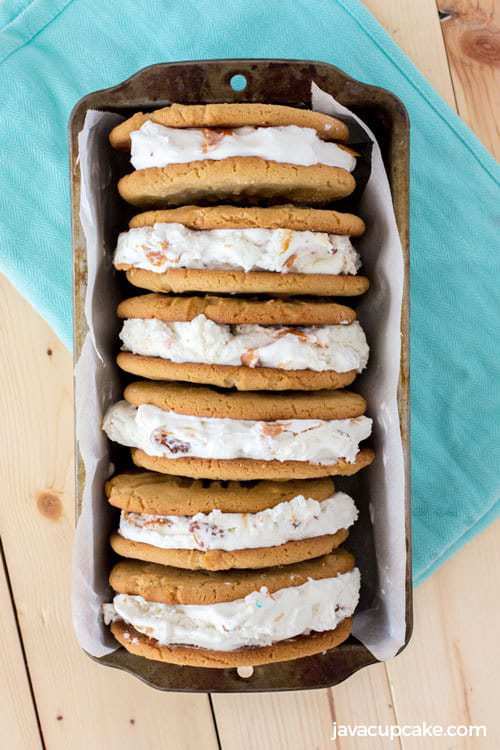

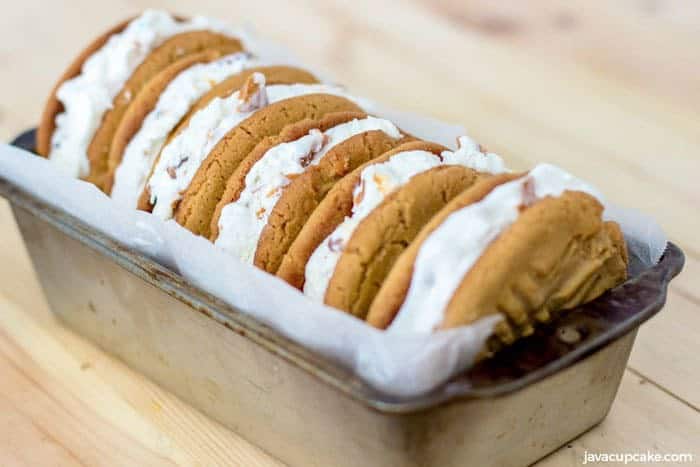
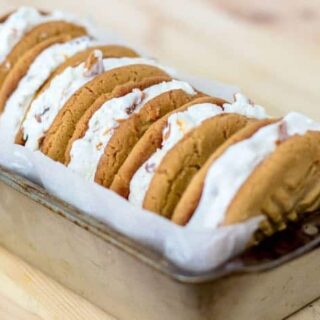
The size of these peanut butter ice cream sandwiches fit perfectly into a loaf pan which made it really easy to store and serve.
I love convenient tricks like this!
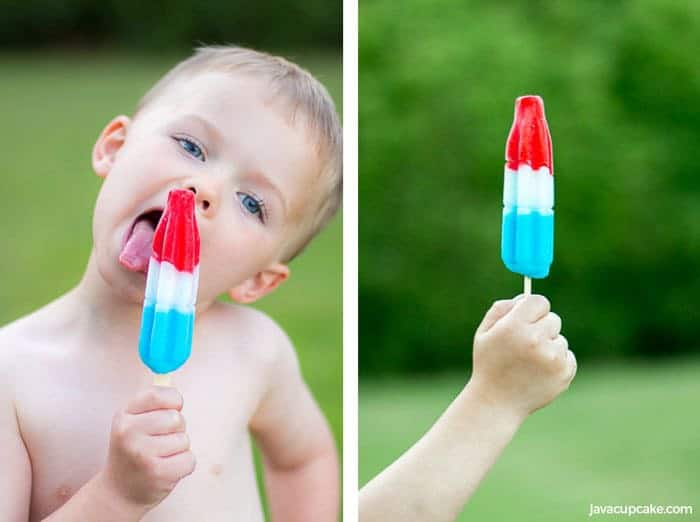

So while your kiddos are enjoying a The Original Bomb Pop®, indulge in these Peanut Butter Ice Cream Sandwiches.
For more Blue Bunny® fun, visit their Social Hub for recipe and party ideas!

Peanut Butter Ice Cream Sandwiches
Ingredients
- 1/2 cup unsalted butter, room temperature
- 1/2 cup shortening
- 1 cup crunchy peanut butter
- 1 cup sugar
- 1 cup light brown sugar, packed
- 2 eggs
- 1 tsp vanilla extract
- 2 1/2 cups all-purpose flour
- 1 tsp baking powder
- 1 1/2 tsp baking soda
- 1/2 tsp salt
- Blue Bunny® PB 'N Cone™ ice cream
- sprinkles (optional)
- kitchen scale
Instructions
- Preheat oven to 375 F degrees. Line baking sheet with parchment paper.
- In the bowl of a stand mixer, cream together the butter, shortening, and peanut butter until combined. Scrape the sides of the bowl and mix again.
- Add the sugars and mix on medium speed until completely incorporated. No need to whip or cream, just combine. Scrape the sides of the bowl and mix again.
- One at a time, add the eggs and mix until combined. Mix in the vanilla.
- Add the flour, baking powder, baking soda, and salt and mix on low speed. Scrape the sides and mix on medium speed until completely incorporated.
- Using the kitchen scale, weigh 50g balls of dough. Roll the dough in the palm of your hand until smooth the gently press to make a disc. Place the dough on the prepared baking sheet.
- Using a fork dipped in flour to prevent sticking, gently press the fork in a criss-cross pattern on the top of each disc of dough.
- Bake for 9 minutes. DO NOT OVER BAKE! Allow cookies to cool for a few minutes on the pan before removing to a wire rack to cool completely.
Assembly
- Set the ice cream out for 5 minutes before assembling to soften.
- Scoop a generous amount of ice cream onto the flat bottom of one cookie.
- Using the rounded back of the ice cream scoop, gently press the ice cream down onto the cookie.
- Place a second cookie flat/bottom side down onto the ice cream.
- Using a flat hand, press down until the ice cream just reaches the edges.
- Optionally, roll the sides of the ice cream sandwich in sprinkles to decorate.
- Freeze for 1 hour or until ready to serve.
Rewari
Monday 2nd of March 2020
These look amazing – peanut butter cookies and ice cream – a match made in heaven!
Kinka Maria
Tuesday 9th of January 2018
I love cookies and I love Icecream so I guess that ice cream cookie sandwich desert is perfect for me :). Hope I don`t get fat with all your desert recipes :).
Kayle (The Cooking Actress)
Tuesday 22nd of August 2017
ooooh yum yum yum-I so need one of these in my life (or 10 :P)
Betsy Eves
Sunday 17th of September 2017
Or 15? ;)
Karla Tesse
Sunday 13th of August 2017
This is the best peanut butter recipe!
Betsy Eves
Sunday 17th of September 2017
Danke!
Elizabeth J
Friday 4th of August 2017
Never thought this could be so easy to make. My son was delighted - Thanks for sharing!