
DIY Painted Pumpkins
I've never really been a big fan of carving pumpkins. It's a huge mess and I really don't think they're all that cool. Yes, jack-o-lanters are a traditional part of Halloween, but I'm more of a Fall and Autumn person, not Halloween. I love everything that Autumn brings... pumpkins, cozy sweaters, boots, Pumpkin Spice Lattes, fires, football, and the turning colors of the trees and leaves.
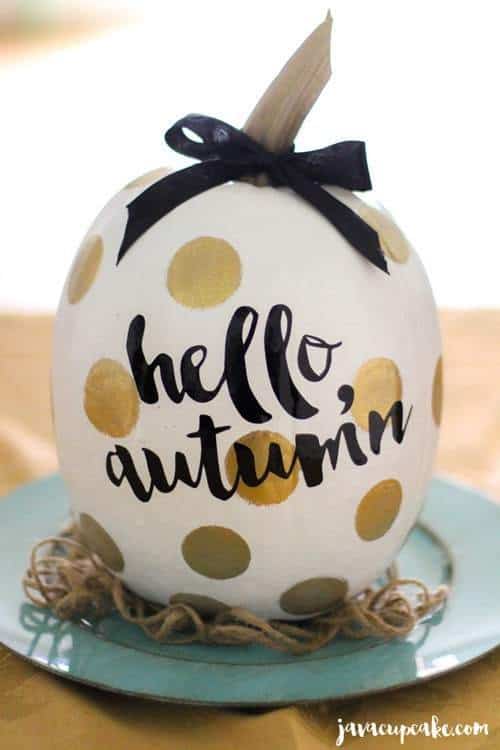
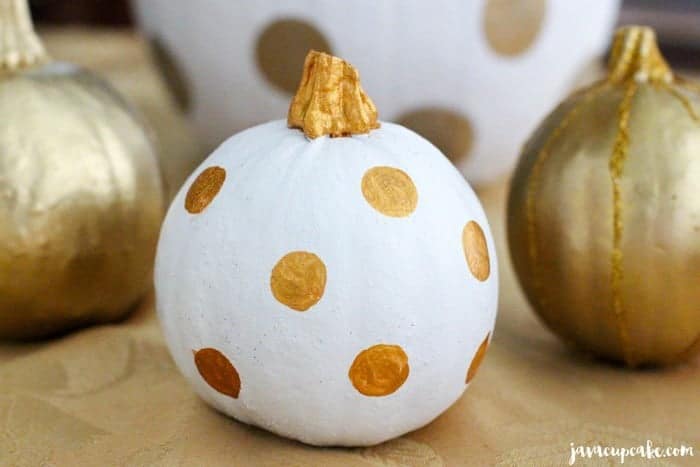
This year, I thought I'd try something a little different. Instead of carving pumpkins I decided to paint them! I'm not talking painting funny faces on the pumpkins like you find at the grocery store, but I wanted beautiful, glam, decorative pumpkins! And in my world that means gold and glitter!
I had a local vendor (Wicked Stickerz) cut the letters for me using her Cricut cutting machine, but you can use any store-bought letters as long as they are stickers.
You can paint your pumpkins any color or with any design, but this tutorial is to show you how I made my pumpkins to get you inspired to create your own!
DIY PAINTED PUMPKINS
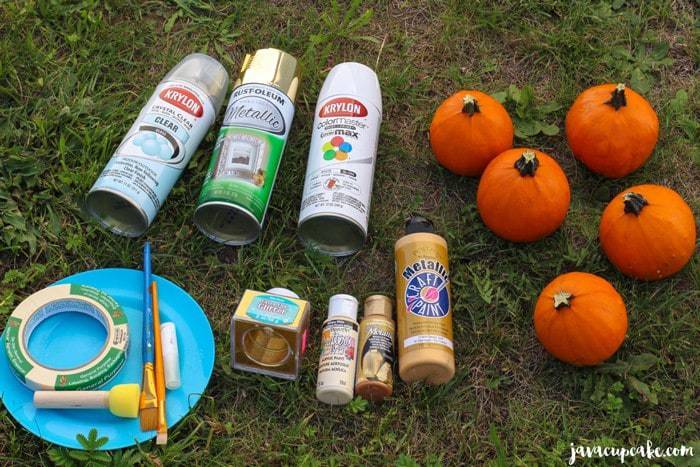
Supplies
- 1 large pumpkin with a long, firm stem
- Mini pumpkins
- White gloss spray paint
- Gold metallic spray paint
- Gold acrylic spray paint
- Gold glitter & glitter glue
- Clear coat glossy finish spray paint (optional)
- 1in round paint dabber
- ½ in paint brush (or any small brush)
- Plastic paint tray (or something to spray the paint onto for dabbing)
- Masking tape
- Newspaper or a work surface that can be painted on
- Vinyl sticker letters/words (download my letters here to be printed with a sticker cutting machine)
- Black ribbon
Instructions (for a large pumpkin)
- Prepare the pumpkin by washing the surface and completely drying it.
- Tape off the stem completely so it doesn't get paint on it.
- Lay newspaper down on your work surface and place the pumpkin in the center.
- According to the instructions on your can of spray paint, spray three coats of white paint on the pumpkin covering it completely. Don't worry too much about turning the pumpkin on its side to get the bottom, just do your best to get to the base of the pumpkin so no orange is visible. Let the white paint dry overnight.
- Spray the gold metallic paint onto the paint tray. Press the round paint dabber into the metallic paint and paint dots in random order on the pumpkin. There's no right or wrong way to put the dots on your pumpkin. If you like a lot of dots, paint a lot and vice versa. You will need to spray more paint onto the plastic paint tray as you continue to paint with the gold. It dries fast so only spray a little at a time.
- Using the small paint brush, paint the stem metallic gold. Allow the gold to paint to dry over night.
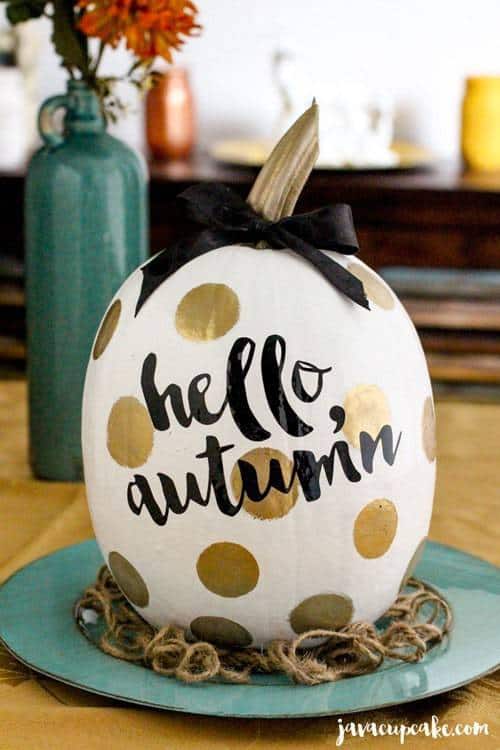
- Apply the vinyl letters carefully to the pumpkin. Once you press the sticky part onto the pumpkin DO NOT LIFT IT UP for it will remove the paint it is stuck to. Plan out where you want the letters and commit. I had a local vendor cut these letters for me using her Cricut machine, but you can buy any sticker letters at the craft store or print them yourself if you have the cutting machine.
- Spray the entire pumpkin with a glossy finish spray paint if you plan to keep your pumpkin outside. This will help protect it from the weather. I did not spray mine because I plan to keep my pumpkin inside.
- Tie a bow around the base of the stem of the pumpkin. Trim the ends at an angle.
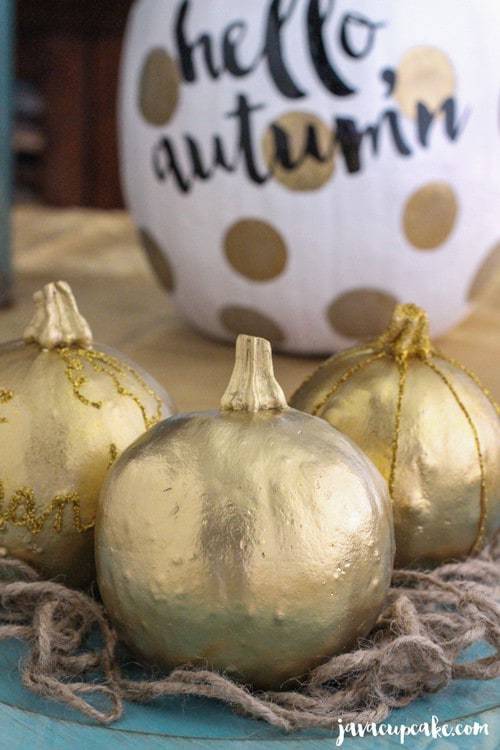
Instructions (for mini pumpkins)
- Prepare the pumpkins by washing the surface and completely drying them.
- Lay newspaper down on your work surface and place a pumpkin in the center.
- One at a time and according to the instructions on your can of spray paint, spray three coats of paint on the pumpkin covering it completely. Allow it to dry completely and gently lay it on its side and spray the bottom of the pumpkin. Allow it to dry completely.
- Repeat with the remaining pumpkins and let them dry completely over night.
- Using the glitter glue, squeeze the glue out of the tube onto the pumpkin in any patter or design you wish. Words are fun with this step too. Immediately sprinkle glitter over the top of the glue and tap off any extra. Allow to dry over night.
- For a white pumpkin, paint the stem with the gold acrylic paint and paint dots around the outside.
- The possibilities are endless! Just have fun!


These are SO cute! We are doing a craft day for our church group and I think I might steal this idea! We are here in Germany as well so I'm wondering where you got your metallic paints from. Yay! Thank you!
Hi Lisa,
OBI has some metallic paint colors, but they are very expensive. I've also seen them in the smaller retail stores in shopping areas like the Stop n' Shop for about €5-7 a can. Wherever they sell craft supplies or home improvment things... sometimes it's just one isle or a few shelves. Just gotta look everywhere! Hope I've been of some help!
What an adorable project!
You said you posted the Cricket file to cut out the letters. I've looked & I can't find it. Thanks.
This is such an adorable project & great idea!