
Stamped Winter Sugar Cookies
Take your sugar cookies to the next level by using these super cute cookie stamps by Core Kitchen! With a little effort, time and the right tools, you can create these Stamped Winter Sugar Cookies that are not only delicious, but almost too cute to eat!
Over the holidays, Core Home surprised me with a gift of cookie stamps from their Core Kitchen line. I have been making sugar cookies for years with cookie cutters, but I'd never thought to use cookie stamps. Maybe it's because I'd never seen stamps as cute as these from Core!
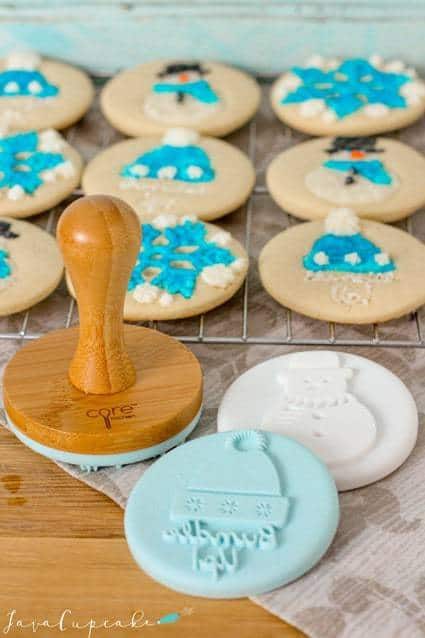
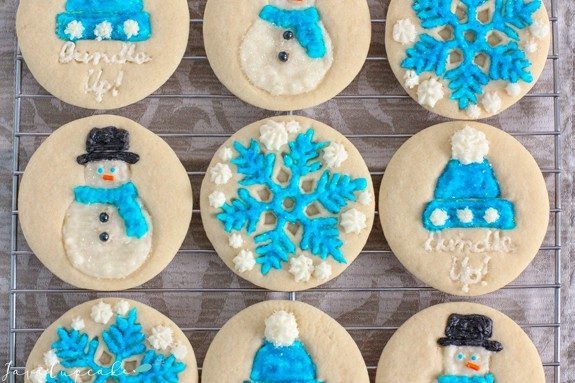
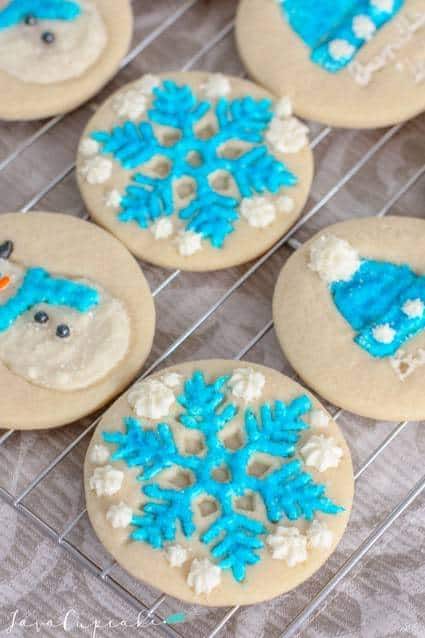
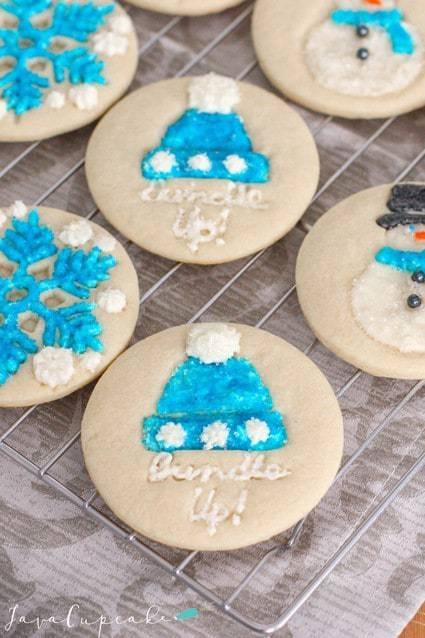
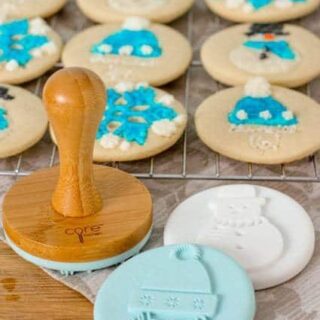
I was immediately inspired to bake up a batch of cookies and get to decorating! It took a little bit of trial and error to figure out exactly how to use these stamps. I chose to use the winter themed pack first. The set included a bamboo stamp with three silicone templates including a snowman, snowflake and winter hat. So adorbs, right!? And those snowflakes.... can we say FROZEN cookies!? Seriously... how perfect would those be for a Frozen themed party?! The instructions on the packaging were a little ambiguous so I wasn't quite sure how to start. But, after some practice I mastered it and my turned out so cute!
The biggest take-away I got from my practice was to stamp the dough before cutting out the shapes. At first, I was cutting the dough with the round cutter then stamping, but I found that pressing the stamp into the dough after cutting created a distorted shape because of the pressure from the stamp. Then, I decided to press the stamp into the dough just after I rolled it out to ⅛" or so. The dough had less space to move and distort because it was still in one big piece. Cutting the circles after stamping created perfectly round cookies every time!
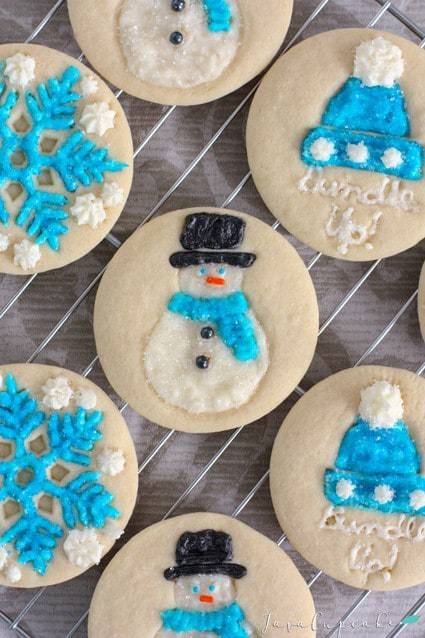
I had no plan when it came to decorating these cookies. I basically took each stamp shape, the supplies I had in my baking closet and went with it. I did decide that the less colors I need to make would be easier, so I stuck to the white and blue theme for all of them. And, instead of having to pipe eyes, nose and buttons on the snowman, I used the sprinkles I had in my baking cabinet.
When you use these stamps to make your cookies, I'd suggest doing the same as far as your approach to decorating is concerned. You don't have to make yours exactly like mine... yet use your imagination and the tools you have at your disposal guide you to the perfect design.
At the end of this process, I just stared at the cookies. I could not believe I had made them. The process was simple, not as difficult as I expected and so much fun! I was truly impressed with how easy the Core Kitchen Cookie Stamps made creating stunning cookies!
Needless to say, I asked Core to send me more stamps. So you can count on seeing more of these types of cookies over the next year! I can't wait to get them and start using them!
As of today, writing this post, these cookie stamps can be found only at JoAnn Fabric & Craft Stores. JoAnn does have three of eight collections available online for sale, so you can get started with those! But check out all the designs below... aren't they awesome!?!?
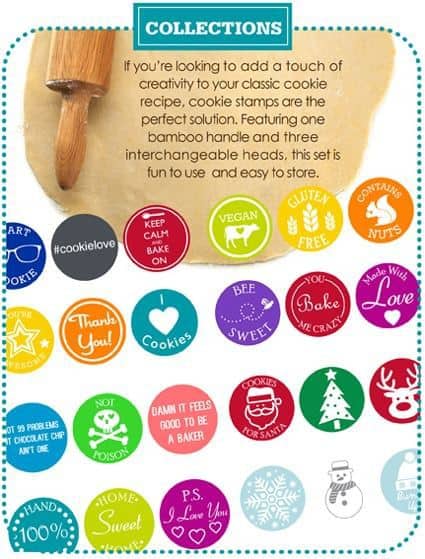
Core Kitchen has set up a website for their Cookie Stamps, but have not yet made them available for sale online. I have been in contact with them and they hope to get an online store up and running soon!
Happy Baking!
Winter Sugar Cookies
Ingredients
Cookies
- ½ cup unsalted butter, room temperature
- ¼ cup shortening
- 1 cup sugar
- 2 eggs
- ½ teaspoon almond extract
- 2 ½ cups all-purpose flour
- 1 teaspoon baking powder
- 1 teaspoon salt
- Core Bamboo Cookie Stamps
- 3 ⅛" round cutter
Buttercream
- ½ cup unsalted butter, room temperature
- ¼ cup shortening
- 1 lb powdered sugar, sifted
- ¾ cup heavy cream
- 1 teaspoon almond extract
- pinch of salt
For Decorating
- blue & black gel food coloring
- Disposable piping bags
- Wilton piping tips #2/3/4 and #16/17
- Orange jimmies
- Blue nonpareils
- Blue and white sugar crystals
- Large black sugar pearls
Instructions
Cookies
- Preheat oven to 400F degrees. Line baking sheet with parchment paper.
- In the bowl of your stand mixer, cream together the butter and shortening. Add the sugar and mix on high 2 minutes until combined.
- One at a time add the eggs and mix until combined. Turn mixer to high and beat until light and fluffy, about 2 minutes. Mix in the almond extract.
- In another bowl, whisk together the flour, baking powder and salt. In two parts, add the flour to the wet mixture and mix until combined. Scrape the sides and bottom of the bowl to ensure you've incorporated everything and mix again if necessary.
- Chill the dough for at least an hour or until firm.
- On a floured surface, turn out the dough, sprinkle flour over the top and knead a few times until the dough is smooth.
- Roll the dough to ⅛" thickness. Press the cookie stamp into the dough to make an impression. Use the round cutter to cut a circle around the impression. Place the cookie on the prepared baking sheet. Repeat until all the dough has been used. You may want to keep the dough chilled between batches to keep it from getting too soft.
- Bake cookies for 5-7 minutes or until the edges and bottoms just being to brown. Do not over bake! Allow the cookies to cool on the baking sheet 2-3 minutes before removing to a wire rack to cool completely.
Buttercream
- In the bowl of your stand mixer cream together the butter and shortening.
- Add the sugar and mix until combined. The mixture will be thick at this point.
- Add ½ cup of the heavy cream, the extract and salt and beat until completely combined for about 2 minutes. You'll want a consistency that's thin enough to pipe through a very small piping tip. Add up to ¼ cup more heavy cream to get this consistency.
- Remove ¼ cup of frosting and tint it black. Divide the remaining frosting in half and tint one half blue. Leave the remaining frosting white.
To Decorate
- Fill piping bags attached with the #2, #3 or #4 small round Wilton piping tip (I used all three, but what you're comfortable with will be what you should use) with the black and blue buttercream. Reserve a small amount of white and put the remaining in a bag with the small round tip. Put the reserved white in a bag fitted with the #16/17 small star/flower tip.
- SNOWFLAKES: Fill in the main snowflake with blue buttercream using the small round tip. Sprinkle the blue with blue sugar crystals. Using the white buttercream and the small star tip, pipe the outter edge impressions with a star. Sprinkle the white with white sugar crystals.
- SNOWMEN: Using the white frosting, fill in the head and body of the snowman. Be careful not to pipe over the eyes and nose or where the hat will be. Sprinkle white sugar crystals over the white. Use the black and pipe on the hat. Finally, use the blue and pipe the scarf then sprinkle blue sugar crystals on the scarf. Use the blue nonparallels as eyes, orange jimmies as the nose and large black sugar pearls as the buttons. You may need to "glue" these pieces on with a bit of frosting.
- BUNDLE UP: Fill in the winter hat with blue frosting. Sprinkle with blue sugar crystals. Using the white frosting with the star tip, pipe on the three balls on the base of the hat and the large ball on top. Sprinkle the white with white sugar crystals. Using the white frosting and the smallest tip you have, pipe frosting into the "Bundle Up" and sprinkle with white sugar crystals.
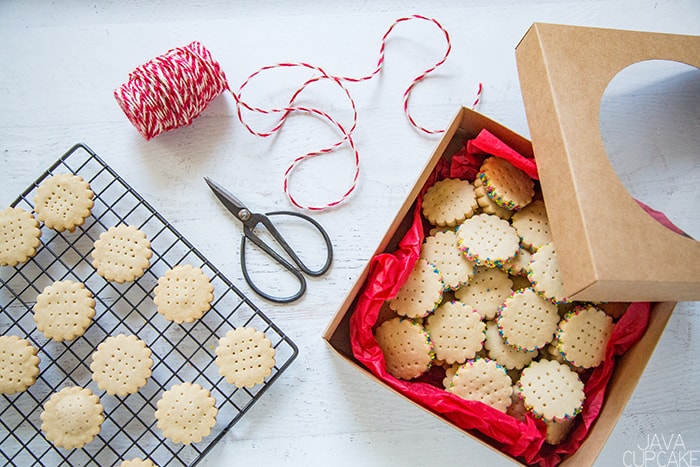
- Allow the cookies to sit for at least 8 hours (preferably overnight) before stacking for storage. Store in a plastic bakery box with a lid for up to 3 days.


These are almost too beautiful to eat! I love sugar cookies. Thanks for sharing.
I love these! I may have to get a bunch because then holiday cookies with the kids will be so much easier 😉
SO cute! I usually only really decorate cookies at Christmas but this would make it so much fun!