
How to Make a Watercolor Cake with Recipe
Watercolor art is a very powerful way to express your feelings.
In this post, you will learn how to make a Watercolor Cake that will encourage you to tap into your inner artist in order to create an edible masterpiece!
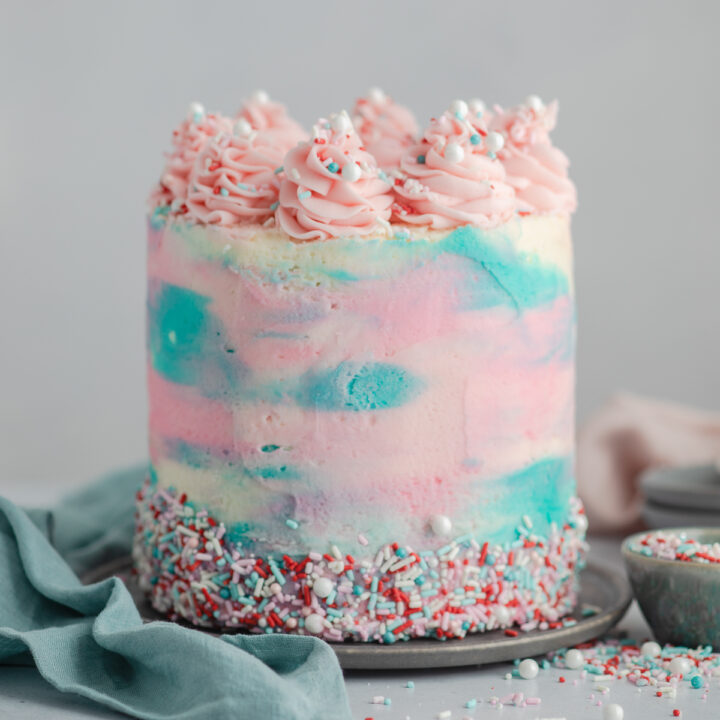
When I started out making this cake, I began with a color palette of teal, pink, white and red. I was inspired by vintage Christmas and new I wanted to make something in this theme.
I shared my inspiration with my friend Lynn at Fresh April Sprinkles.
Lynn makes custom sprinkle mixes and I asked if she could take this color palette and run with it!
After a few back and forths, deciding on color shade and sprinkle size and mix options... I finally decided on this:
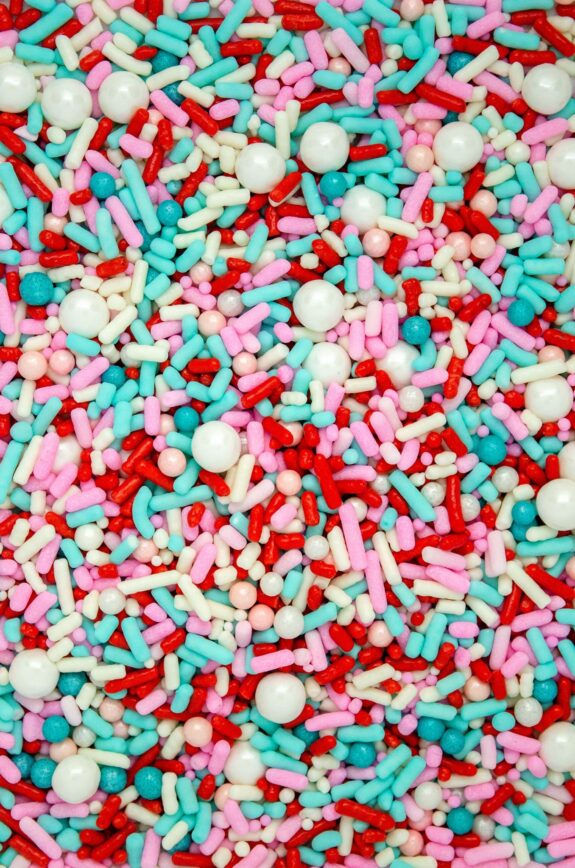
This custom mix turned out so good! As soon as it arrived, I couldn't wait to bake something and use these sprinkles.
Originally, I had wanted to make a striped cake with a drip. However, when I actually made the cake, the stripes weren't working so I decided to pivot.
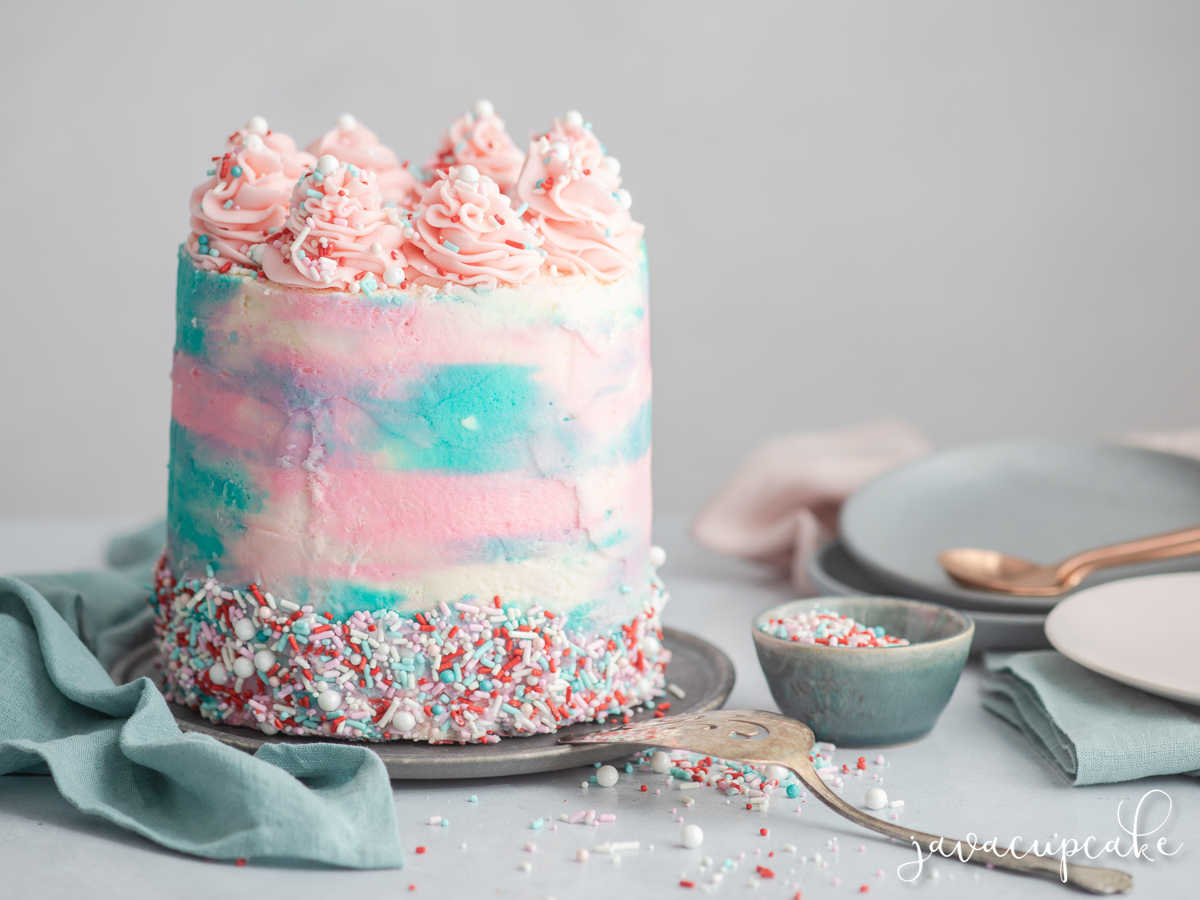
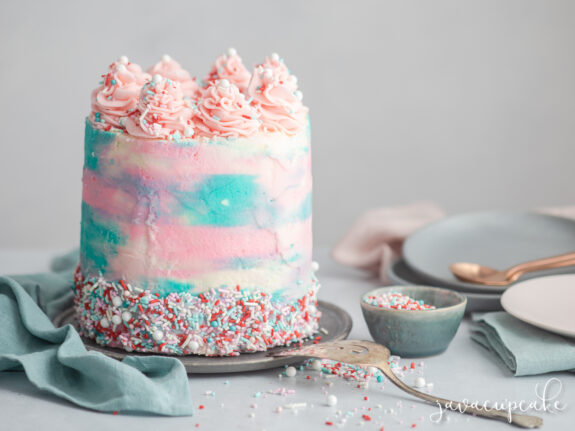
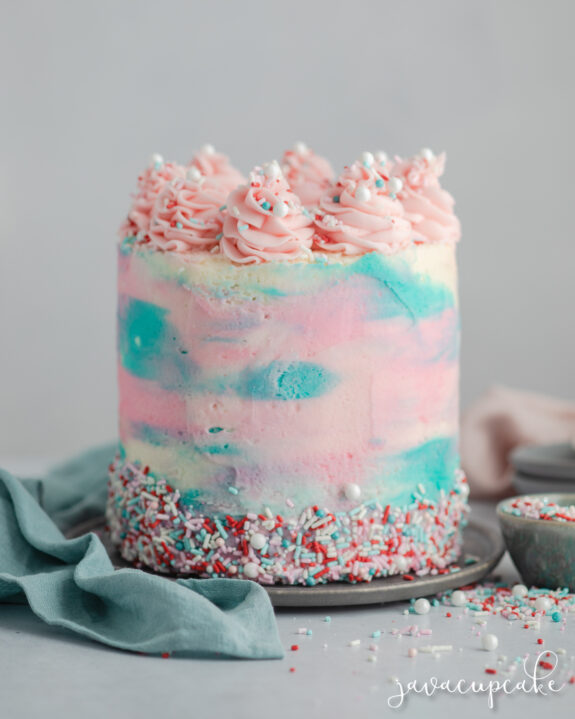
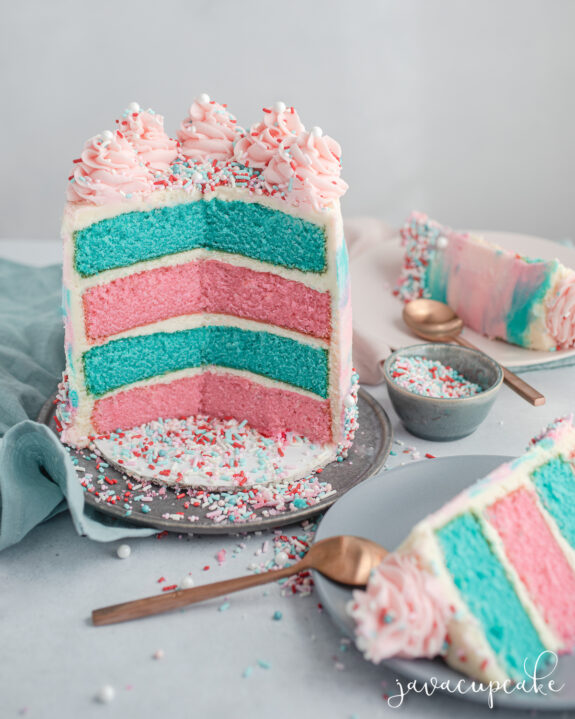
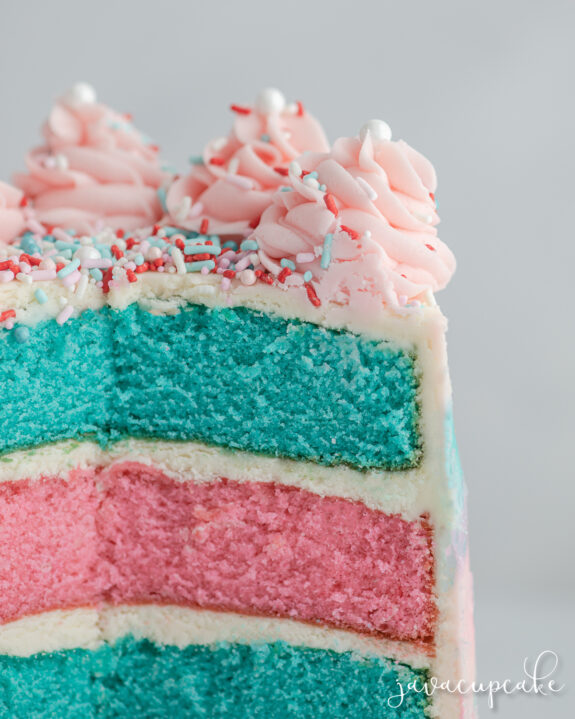
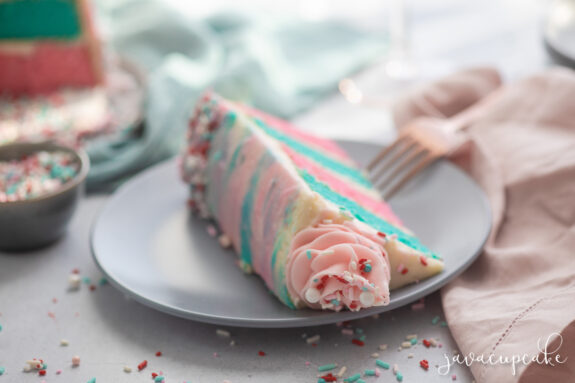
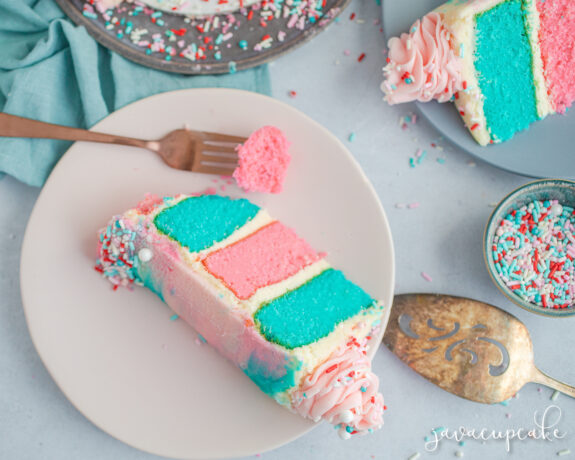
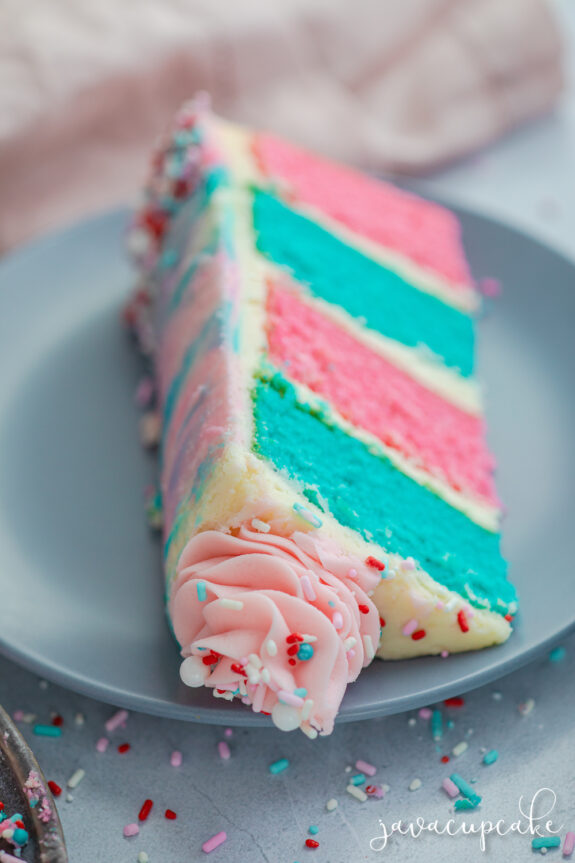
This beautiful watercolor cake was the final product!
How to Make a Watercolor Cake
1. Make the Cake Layers - Use your favorite cake recipe to make the cake layers. I use a basic white recipe, but any will do as long as you can color the cake. If you don't want to make it from scratch, store-bought works too! Follow the recipe below for details.
2. Make & Color the Buttercream - I always use my basic buttercream recipe when making layer cakes. I would not recommend using store-bought frosting for this cake as it tends to be too soft.
Again, follow the recipe below for details.
3. Frost or "Paint" the Cake - Using an offset spatula, take large dollops of frosting to the side of the cake and smear it along the side. I recommend placing the color 7-8 times around the cake and then switch to another color.
Repeat until all three colors have been used.
There is no right or wrong way to do this. I do suggest not stacking the colors - meaning place them apart or next to because when you smooth it out, the frosting will smooth in the gaps and blend together.
Better to start with less frosting dollops and fill in as you smooth.
4. Smooth the Dollops - Hold a straight edge (a bench scrape, cake smoother, or even a ruler) at a 90-degree angle to the cake and pull the frosting smooth. After each stroke, wipe the edge off and add more frosting dollops as needed.
Less is more with this step, the cake will never have a perfect look as that is not the intention of this technique. Continue smoothing the side then the top of the cake until you reach your desired amount of blending.
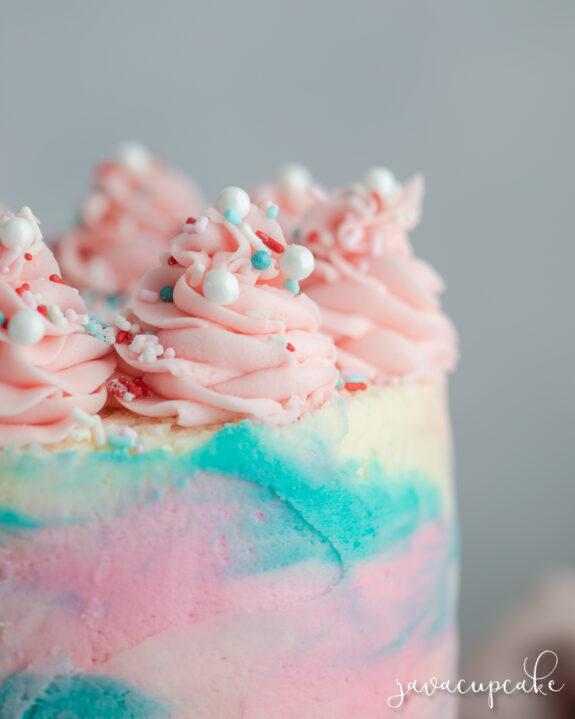
5. Swirls on Top - There is no right or wrong way to add swirls of frosting to the top of the watercolor cake.
My favorite is using a Wilton 1M piping tip to swirl towers of frosting around the edge of the cake. However, any piping tip and or style of swirl would be cute!
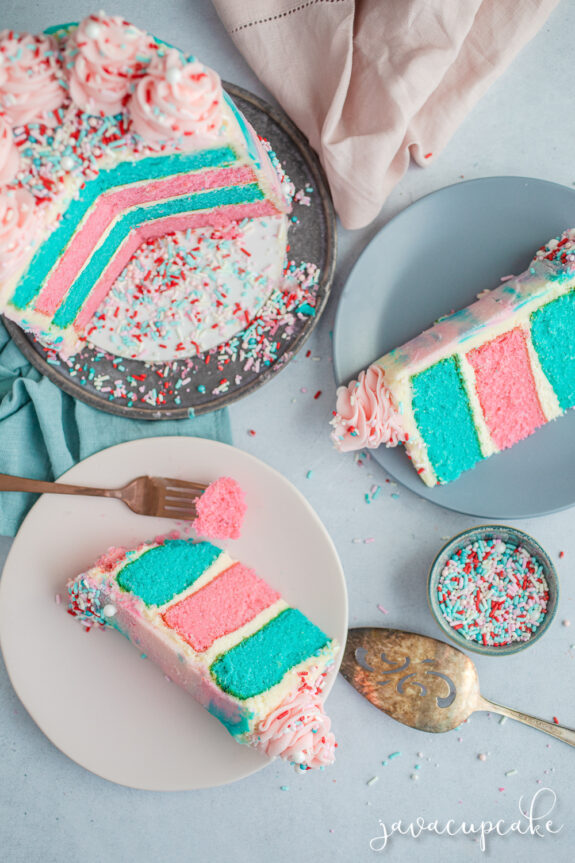
6. All the Sprinkles! - Sprinkles add a little extra something special to the cake. For this particular cake, I had a custom sprinkle blend made by my friend Lynn at Fresh April Sprinkles.
I scattered the sprinkles on top of each swirl on top and pressed them into the bottom inch or so of the cake.
NOTES
- When choosing colors for the watercolor cake, think about how they will blend together. Two colors that blend to make a brown would not be a good choice.
Use tools such as this color wheel to help you decide.
- Other types of frosting such as store-bought or swiss meringue, etc can also be used. However, I recommend if you're a new baker to use the recipe listed below.
- Reserve a bit of plain, white buttercream to add as needed after smoothing or if you over-blend.
More Cake Ideas
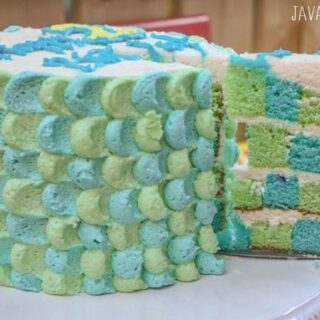
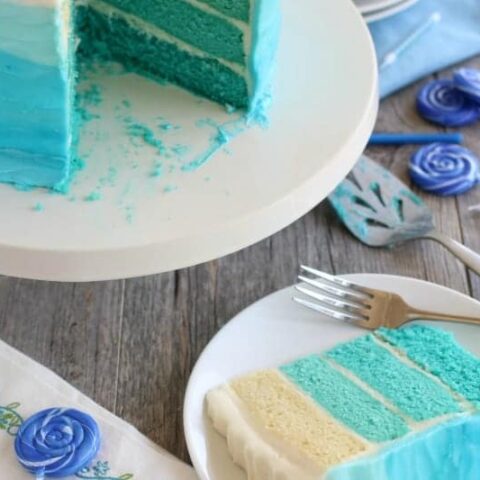
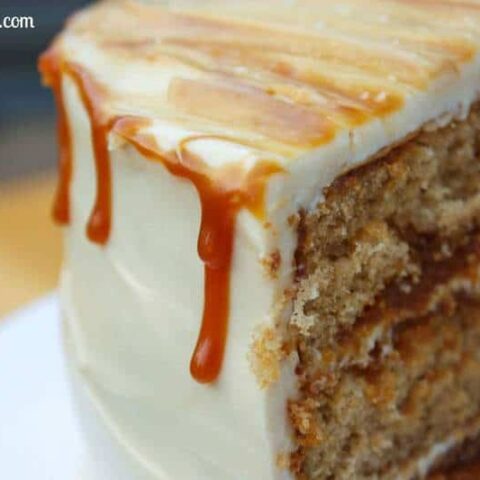
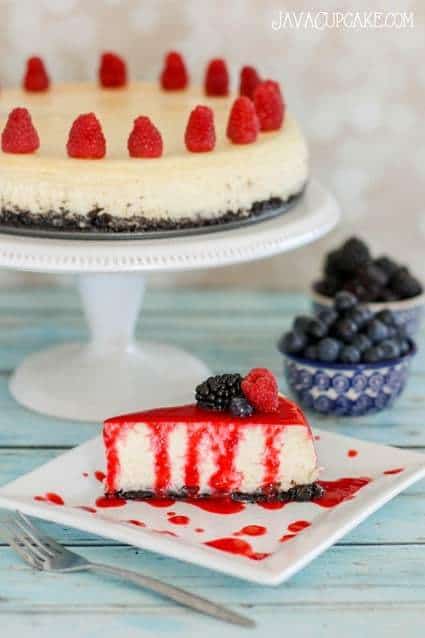
Layers of brown sugar cake filled and topped with caramel frosting and a drizzle of fresh caramel & fleur de sel make this Salted Caramel Layer Cake a decadent, delicious and almost sinful dessert!

Watercolor Cake Recipe
Ingredients
Cake
- 6 tablespoon unsalted butter, room temperature
- ⅔ cup vegetable oil, 160ml
- 2 cup granulated sugar, 400g
- 1 tablespoon clear vanilla extract
- 2 ⅔ cup + 2 Tablespoon all-purpose flour, 345g
- 1 tablespoon baking powder
- 1 teaspoon salt
- 1 cup sour cream
- 6 large egg whites, room temperature
- gel food coloring (optional)
Buttercream
- 1 cup unsalted butter, room temperature
- 2lbs powdered sugar
- 1 tablespoon clear vanilla extract
- ⅛ teaspoon salt
- ⅔ cup heavy whipping cream
- gel food coloring
Decorating Tools
- Large & small offset spatulas
- Wilton 1M piping tip
- Piping bag (I use 12in disposable from Wilton)
- Bench Scraper
Instructions
Cake:
- Preheat oven to 350F.
- Grease, flour, and line with parchment paper four (4) 8-inch round cake pans.
- Using a stand mixer, cream the butter until smooth.
- Add sugar and oil and beat until all ingredients are well-combined and creamy.
- Scrape down the sides and bottom of the bowl and then stir in your vanilla extract.
- In a separate bowl, whisk together your flour, baking powder, and salt.
- Measure sour cream.
- With the mixer on medium speed, gradually alternate between adding the flour mixture and the sour cream, starting and ending with the flour mixture. Stir until each one is almost completely combined before adding the next.
- Pause occasionally to scrape down sides and bottom of the bowl.
- In a separate bowl with a hand mixer or another stand mixer, combine the egg whites and beat on high speed until stiff peaks form.
- Using a spatula, gently fold your egg whites into your batter. Take care to scrape the sides and bottom of the bowl so that ingredients are well-combined, and take care not to over-mix.
- (Optional) Using a scale, weigh out two equal portions of batter. Gently fold gel food coloring into the batter until the color is incorporated.
- Using a scale, evenly divide each color of the cake batter into prepared pans.
- Bake on 350F for 35-40 minutes, or until a toothpick inserted in the center of each cake layer comes out clean or with few crumbs (should not be wet). For best results, rotate your cake pans halfway through baking to ensure even baking.
- Cakes will be a light golden brown when done baking.
- Remove cakes from oven and allow to cool for 15 minutes.
- Allow the cakes to cool completely before frosting.
Buttercream:
- Using a stand mixer, cream the butter until smooth.
- Add half the powdered sugar, vanilla, salt and ¼ cup of heavy cream. Gently mix together on low-medium speed.
- Once the ingredients begin to come together, scrape the sides of the bowl and add the remaining sugar and ½ cup of heavy cream. Mix on medium-high speed until combined. Scrape the sides of the bowl.
- Beat on high for 30 seconds. Check the consistency of the frosting. If it is too stiff, add 1-2 tablespoon of cream and beat for 30 seconds. Recheck the consistency. Repeat if necessary.
- Once desired consistency is reached, beat on high for 2 minutes or until light and fluffy.
- Separate the frosting into three even amounts and place them in their own bowl.
- Leave one bowl white and color the remaining two in different colors.
How to Make a Watercolor Cake
- Chill cake layers for 30 minutes.
- Fill, stack, and crumb coat cake. (I used this video as a guide.)
- Using an offset spatula, take a 1-2Tbsp dollop of frosting and paint/spear it on the side of the cake. Repeat this 8-9 times across the entire cake with the same color. With the two different colors, repeat the process. (I used this video as a guide.)
- NOTE: Don't worry about filling in the entire cake with these dollops - when you blend it out, the holes will fill in.
- Using a bench scraper, blend the sides of the cake until smooth. Add additional dollops of frosting to fill in the holes and smooth again.
- Using a Wilton 1M piping tip fitted on a frosting bag, pipe swirls of frosting onto the top of the cake.
- Use your favorite sprinkles to finish off the cake.


Can this recipe be turned into a chocolate cake by adding cocoa?
Nope. Not a good idea.
What a stunning tutorial, The watercolor effect on the cake is absolutely beautiful, and I love how you broke down the process step-by-step. I can’t wait to try this at home for my next celebration. Thank you for sharing such creative ideas and tips.