
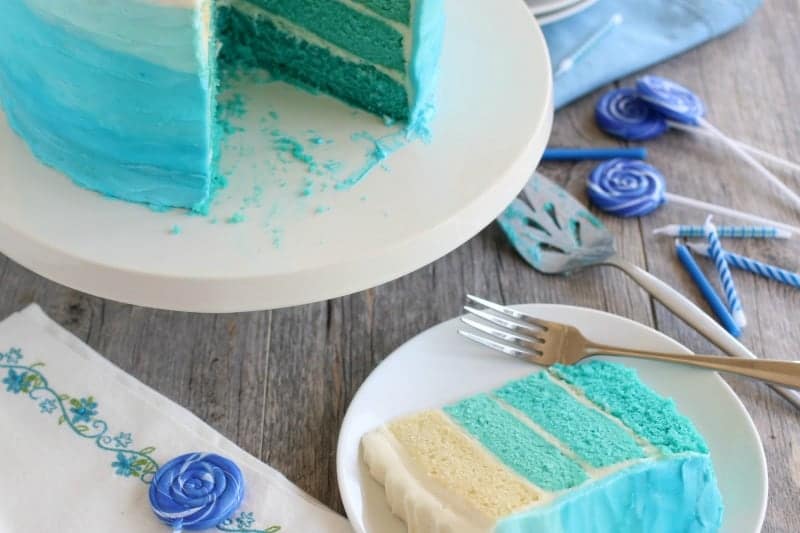
Blue Ombre Cake Tutorial
Looking for a Frozen-themed treat? Want to learn how to make an ombre cake? Look no further than this Blue Ombre Cake Tutorial! This is an easy ombre cake tutorial that anyone can follow, even if the results look anything but simple! 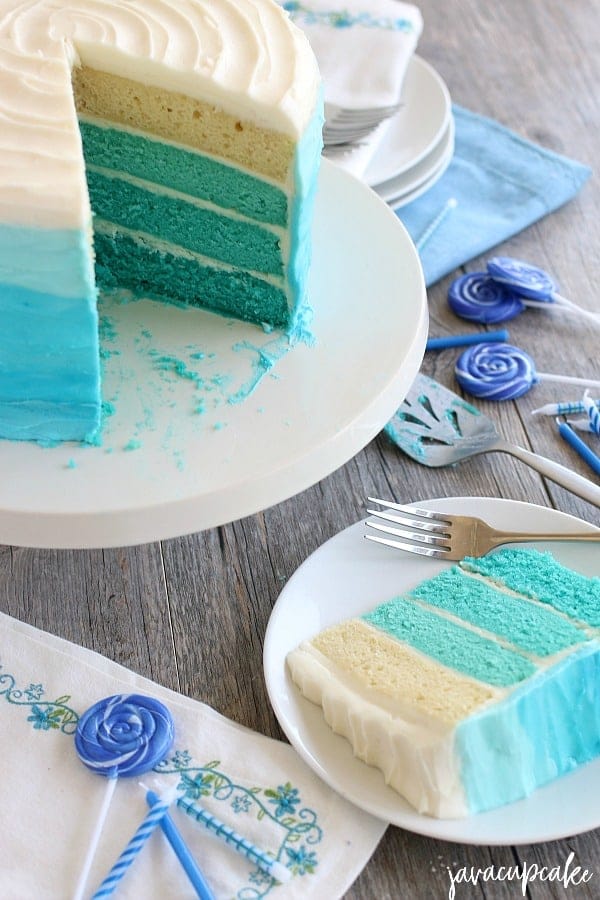 Why a blue ombre cake? Well, one of my closest friends celebrated her husband's birthday this past weekend and asked me to make his birthday cake and cupcakes. Jody didn't want anything special, as it turns out. He said, "Just something simple...vanilla is good!" Hmmm…I don't do simple. Ha! But…I do make a killer vanilla cake and vanilla buttercream! And I knew an ombre cake would be even better for Jody. This cake, however, couldn't be like my last cake, which was pink and girly. This cake had to be fit for a soldier and a man! So: blue ombre cake layers covered in blue ombre buttercream. PERFECT!
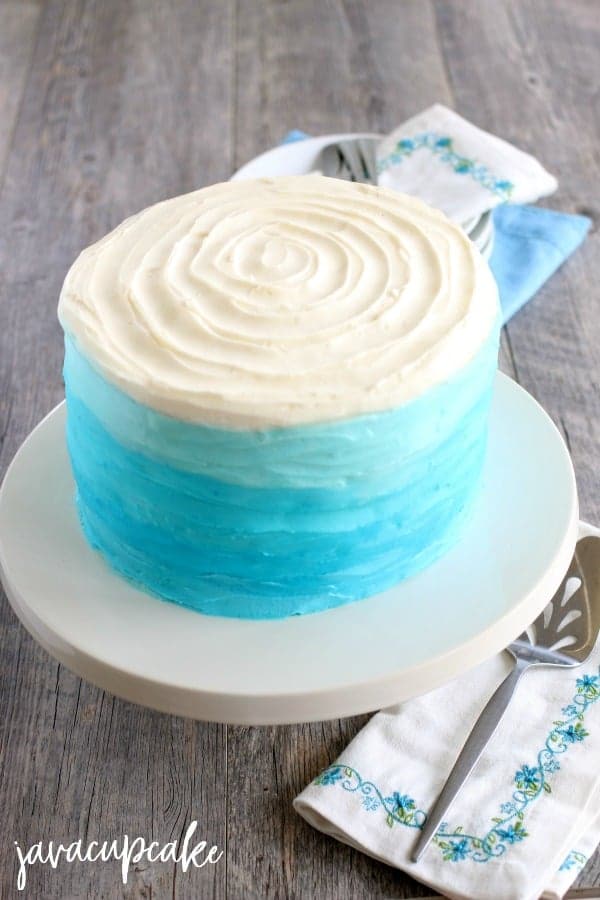 Here's how to make your own...
Blue Ombre Cake Tutorial
I found the process to make this cake pretty easy, so don't feel overwhelmed! You only need a few extra steps (to add color) from my vanilla cake and buttercream recipes. Having a cake turntable and the right supplies really helps the process too! Making the Cake Layers: Ingredients & Utensils
- Perfect Vanilla Cupcakes & Buttercream (I used a double batch of the cake batter, and a triple batch of the buttercream)
- Wilton Food Color Gel in Sky Blue
- Toothpicks
- 4 bowls & spatulas
 Making the Cake Layers: Instructions
- Preheat oven to 350 F degrees. Grease, flour, and line the bottom of four 8-in cake pans with parchment paper.
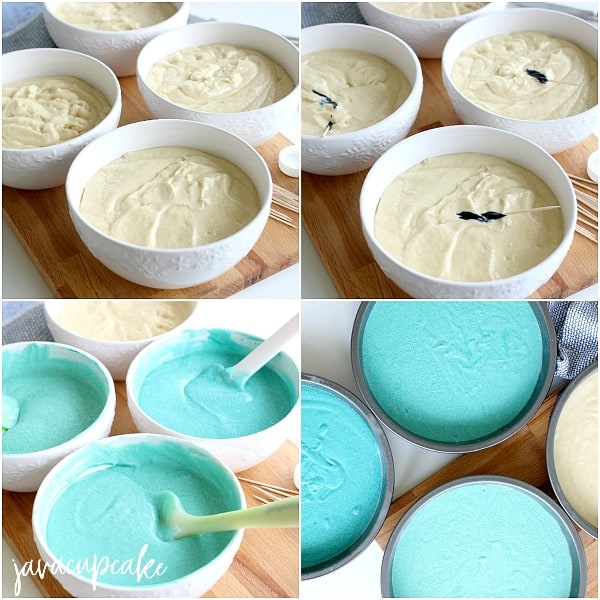
- Prepare the vanilla batter as the recipe describes. Divide batter evenly into 4 bowls. Set one bowl aside, as it will not be colored.
- Dip a toothpick into the blue food coloring gel and transfer a very small amount of food color gel into one bowl of batter. Use a spatula to incorporate the two until you get a uniform color. Set aside.
- Dip another toothpick into the gel and transfer a slightly larger amount of gel into the second bowl of batter. Use a spatula to incorporate the two until you get a uniform color. Set aside.
- Finally, dip one last toothpick into the food color gel and transfer a large amount of gel into the last bowl of batter. Use a spatula to incorporate the two until you get a uniform color.
- Spread the batters evenly among the 4 pans. Bake for about 10-12 minutes or until a toothpick comes out clean.
- Cool in pans for 5 minutes before removing to a wire rack to cool completely. Frosting the Blue Ombre Cake: Ingredients & Utensils
- Your 4 cake layers
- Buttercream (triple batch of the recipe above)
- Wilton Food Color Gel in Sky Blue
- Toothpicks
- 4 bowls & spatulas
- Cake turntable
- Plastic wrap
 Frosting the Blue Ombre Cake: Instructions
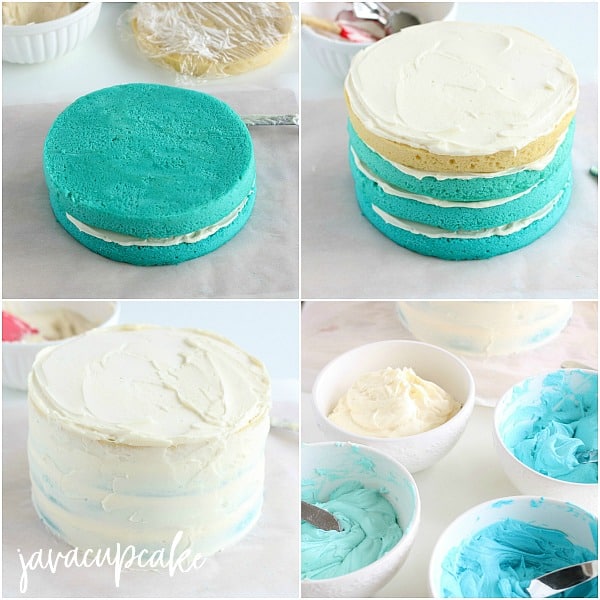
- Wrap the cake layers in plastic wrap & freeze for about 30 minutes or until ready to use.
- Spread a generous layer of buttercream between each layer of cake and apply a crumb coat of buttercream to the outside.
- Freeze for another 30 minutes. Remove from freezer and place cake on a cake turntable.
- Separate the buttercream into 4 parts and place in 4 bowls. Set aside a little extra for the white part of the ombre.
- Using Wilton Food Color Gel in Sky Blue, dip a toothpick into the food gel. Be sure to get only a VERY small amount of gel onto the pick!
- Smear the pick into one bowl of the buttercream and use a spatula to incorporate until uniform. Set aside.
- Repeat this process for the rest of the buttercream, but use a little bit more gel color on the toothpick each time. In the end, you should have three shades of blue buttercream and one batch of white buttercream.
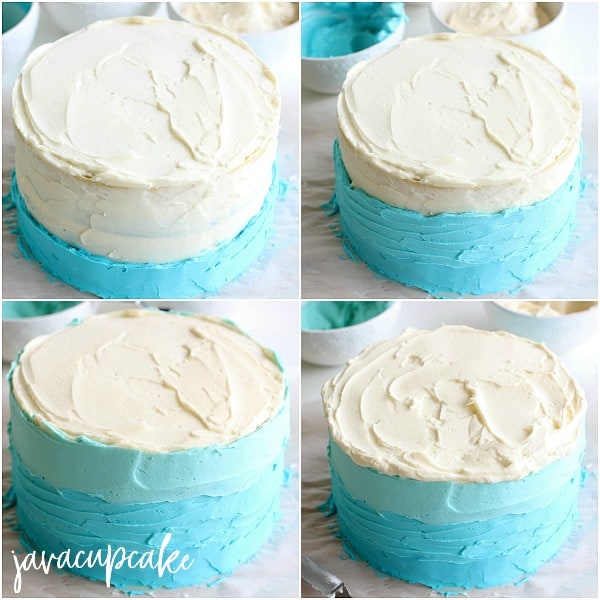
- Begin with the darkest shade of blue. Using a small spatula (I used an offset spatula), spread an even half-inch thick layer of buttercream around the bottom third of the cake.
- Hold the spatula flush against this layer to smooth out any massive bumps of buttercream. Wipe the spatula clean before moving on to the next color.
- Repeat the last step using the next lightest shade of blue buttercream to spread on the second third of the cake. Overlap the two colors where they meet.
- Finally, use the lightest shade of blue buttercream to spread on the final third of the cake. Remember to smooth the sides with the edge of the spatula. Note: Leave a ¼th-inch border of non-frosted cake at the top. You'll need room for the white frosting!
- Using the white buttercream, spread a half-inch layer of buttercream on the top of the cake, ensuring you cover it all the way to the edges. It's okay if the buttercream goes over the edge! You want to fill in that ¼th-inch of cake that you left unfrosted.
- Using the edge of the spatula, smooth side and top of the white buttercream.
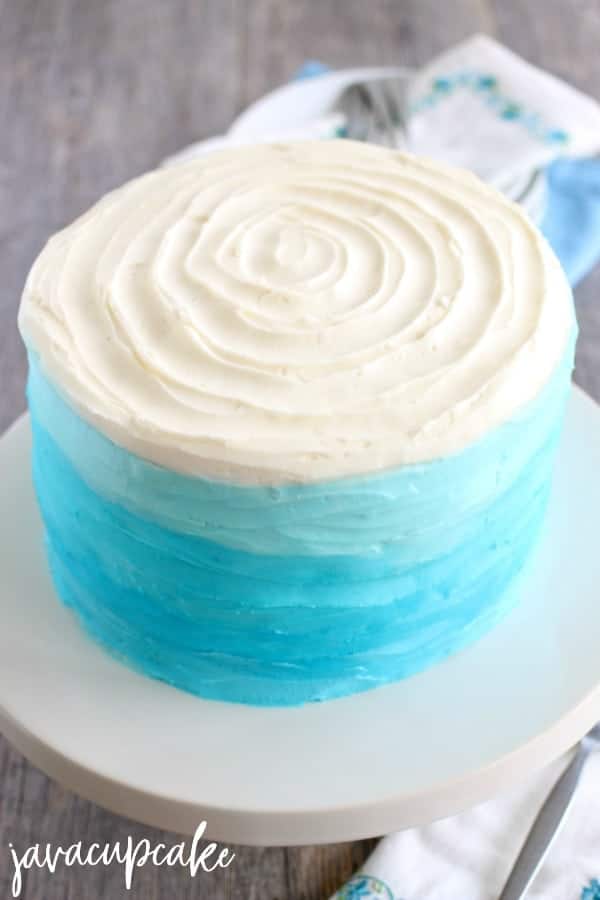
- Create the "ribbon" effect by holding the tip of your spatula sideways against the darkest color and bottom edge of the cake. Pressing gently, slowly and smoothly spin the cake turntable while simultaneously dragging the spatula up the side of the cake.
- You may need to stop and wipe any excess frosting after each revolution if you are pressing too hard. Continue turning the cake and dragging the spatula up until you reach the top of the cake. Note: Imperfections are very easy to cover up with with style of decorating! Don't be afraid to go over the "ribbons" until the colors have smoothed together.
- Wipe the spatula clean. To create the final ribbon effect on top of the cake, gently press the tip of the spatula into the middle of the top and spin the turntable while simultaneously dragging the spatula towards the outside of the cake.
- You may have some excess frosting along the edges of the cake's top; simply press your spatula on the edge where the top and side meet and spin the turntable until it is smooth.
- Place cake back in freezer for about 20 minutes so that the buttercream sets up.
- Transfer cake to your cake stand or plate for serving.
Happy baking!
I hope you enjoyed this blue ombre cake tutorial! If you have any questions about any of these steps…please, please, please do not hesitate to leave a comment down below. There's no stupid questions, because everyone can learn from the answer. Also, I'd LOVE to see your pictures using this tutorial. Send them on over to betsy [at] javacupcake [dot] com!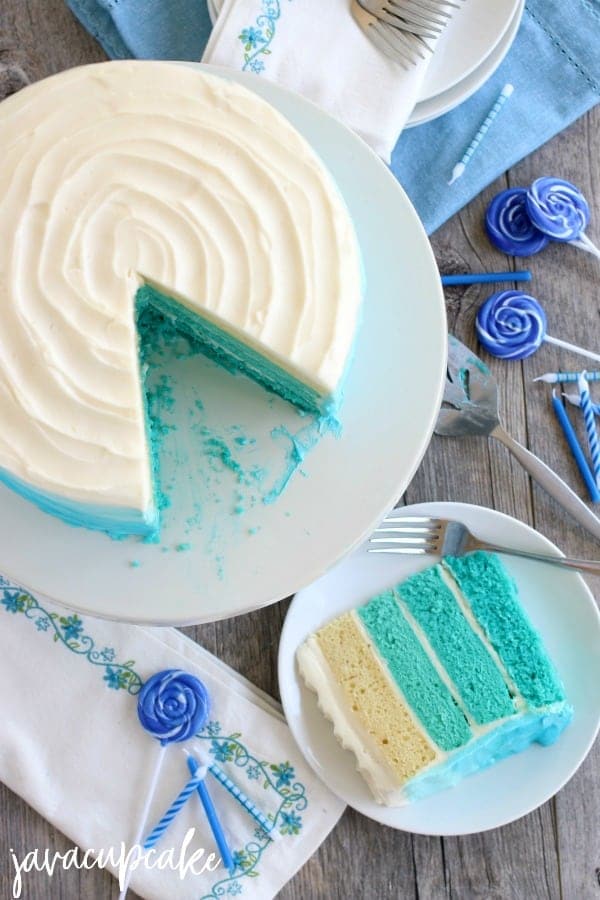


Hey Betsy!! Just read ur tutorial. It is so GOOD & easy to follow. I'm def using this technique for the bottom tier of my daughters upcoming Bday. Mermaid theme! The spiraling technique will be an excellent representation of "waves"! PLUS the ombre effect will make it look exactly like water colors do the closer u get to shore. AND The top of the bottom tier (base area b/w the 2 tiers) will have a mix of brown sugar & graham cracker crumbs to rep the "shore"! So u have basically made my night & locked down the last few details of her cake!!! Thank u Thank u Thank u! XOXO
Fantastic Shannon! Let me know how it turns out!
I'm making 2 tiers
Do I frost each tier and then stack
Or
Stack (with dowels)
Then frost?
Hi, did you figure this out? I am making 2 tiers next week, and using this recipe. I'd say frost each tier and then stack, but let me know what you did!
SUCH A AMAZING RECIPE!
THANK YOU FOR SHARING...