
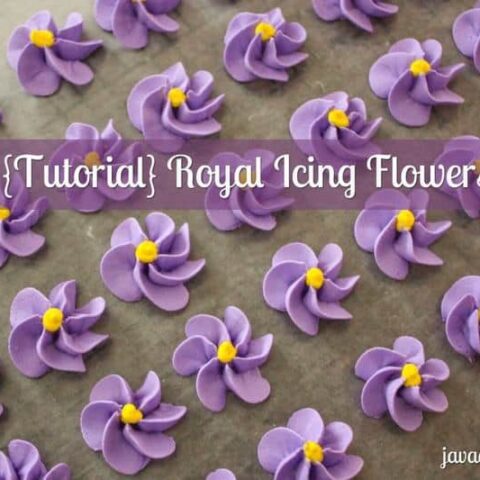
Get Ready to Wow with Royal Icing Flowers
You don't have to be a professional baker to create stunning and sophisticated desserts! All you need is a little creativity, a few simple ingredients, and this step-by-step guide to making Royal Icing Flowers.
Get ready to be amazed by the endless possibilities of this sweet and stylish technique! With just a few piping bags, tips, and food coloring, you can turn any cake or dessert into a work of art.
Let's dive in and discover the beauty of royal icing!
Royal Icing History
Royal icing may have originated in Europe (England or France, to be exact), but it's still a reigning champion in the world of cake decoration today.
Then, it was often used to adorn elaborate cakes and pastries for royalty and high-society events.
Today, we are enchanted by its smooth, glossy finish and delicate decorations, especially during the holiday season.
But what is royal icing, exactly? It's a simple mixture of powdered sugar, egg whites, and sometimes a touch of lemon juice or cream of tartar.
The best part? It's easy to tint with food coloring, so you can match it to your cake's theme or try out new and bold colors.
Get Your Supplies Ready
To make the icing, you'll need the following:
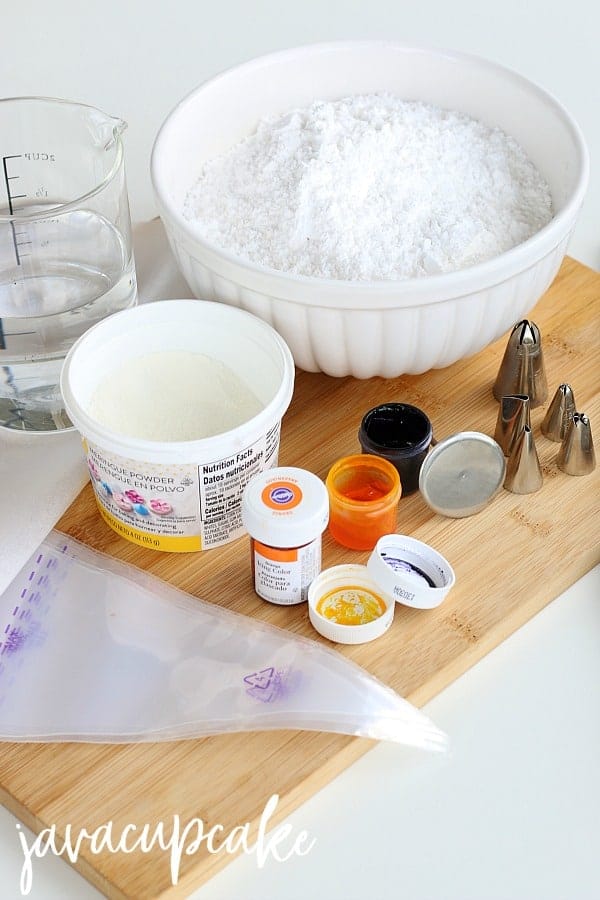
- 4 cups of powdered sugar
- 3 tablespoons of meringue powder
- 6-9 tablespoons of room-temperature water
- Wilton gel coloring (yellow for the center of the flowers, plus any other colors you'd like)
- A stand mixer with a whisk attachment
- Bowls
- Toothpicks
- Disposable piping bags
- Wilton #1M tip
- Wilton #4 tip
- Wilton #18 tip
- Wilton #104 tip (optional)
- A flower nail (also optional)
- Wax paper
- A flat surface to work on
Whip Up Some Icing
First things first, let's make the royal icing!
- Sift the powdered sugar in a large mixing bowl to remove any lumps.
- Add the meringue powder and water to the bowl and mix until combined.
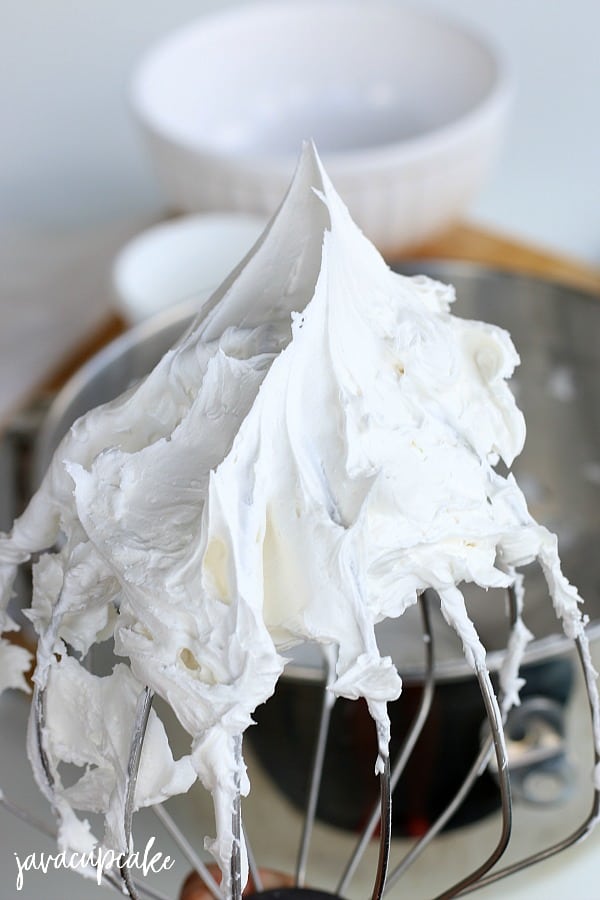
- Using the stand mixer with the whisk attachment, beat the mixture on high speed for about 7-8 minutes or until the icing holds stiff peaks.
- Divide the icing into separate bowls, one for each color you'll be using.
- Use the Wilton gel food coloring to tint each bowl of icing to the desired shade.
- Spoon the icing into separate piping bags and attach the desired tips.
Your royal icing is now ready to use!
Ready, Set, Pipe!
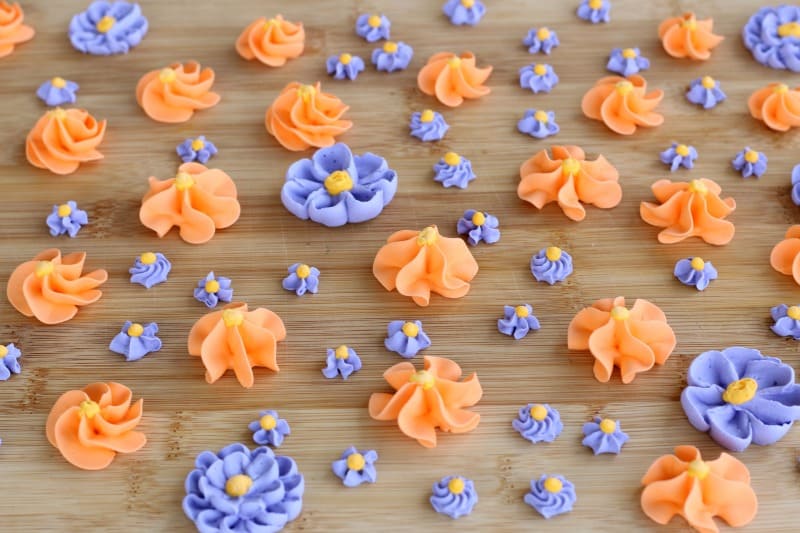
Now, it's time to start creating your beautiful flowers.
- Cut off the tips of your piping bags and insert the appropriate tips.
- Fill the Wilton #4 tip bag with the yellow icing and the #1M tip bags with the other colors.
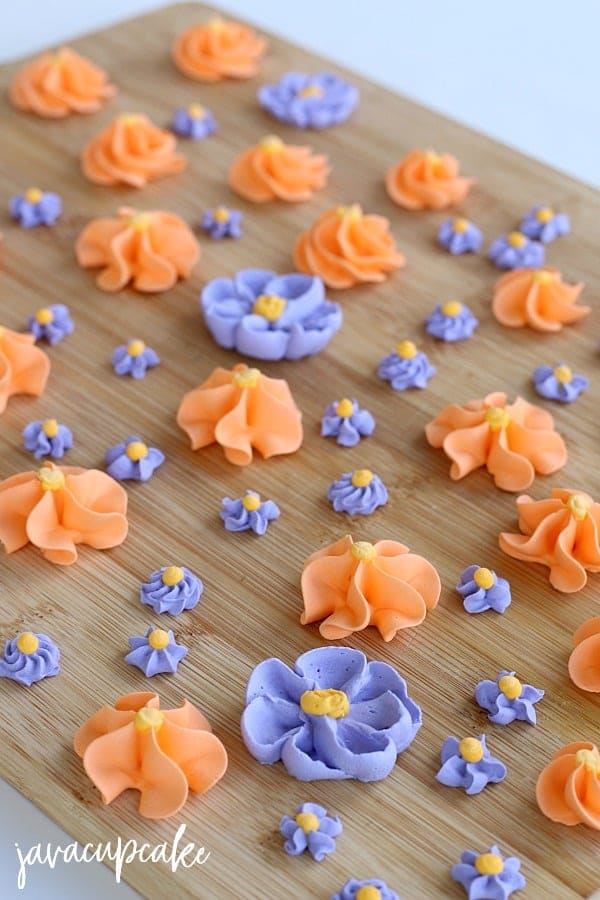
- Place a large piece of wax paper on a flat surface and get ready to pipe!
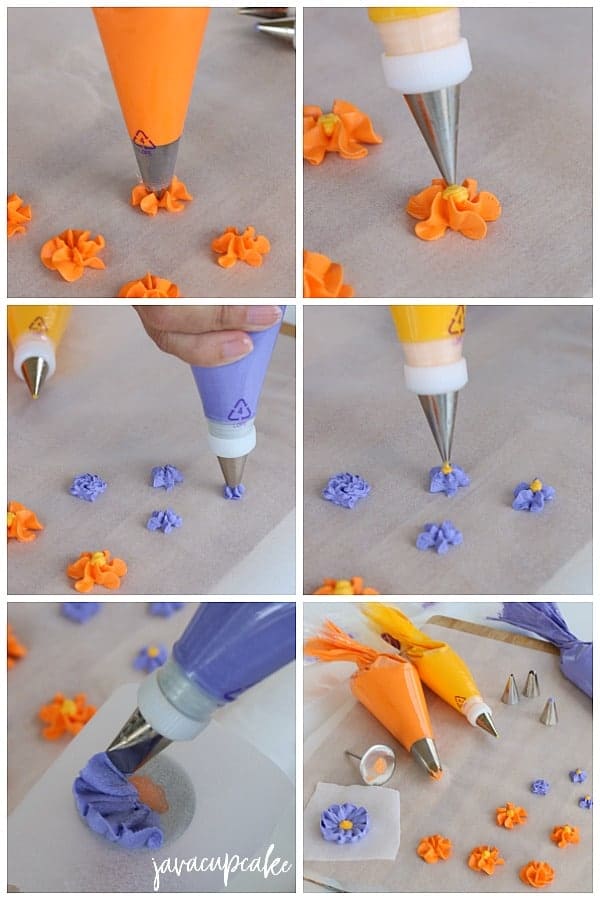
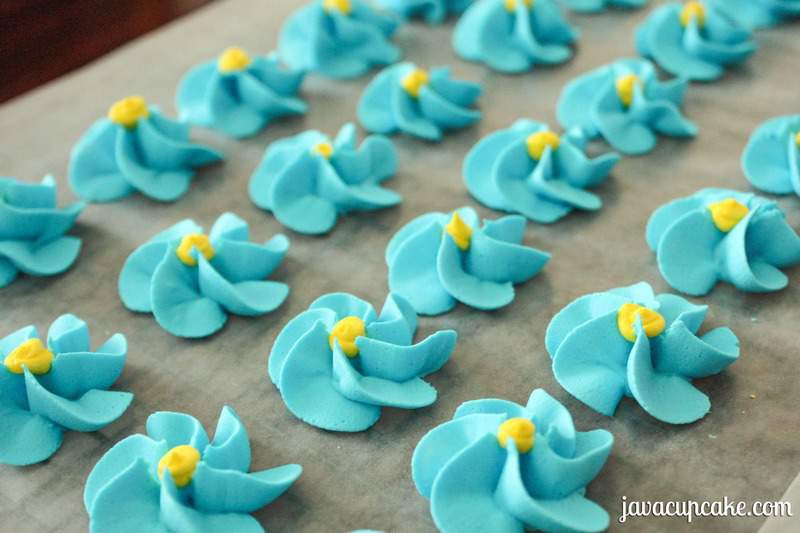
- Hold the #1M tip bag at a 90-degree angle to the wax paper directly above but not touching it. Apply firm pressure to the bag to start the flow of icing, then immediately rotate it, keeping it straight and continually pressing the icing out. Release tension and pull the bag straight after spinning about a quarter turn.
- Repeat this process with each color of icing.
- Using the yellow icing bag and #4 tip, pipe a small yellow dot in the center of each flower.
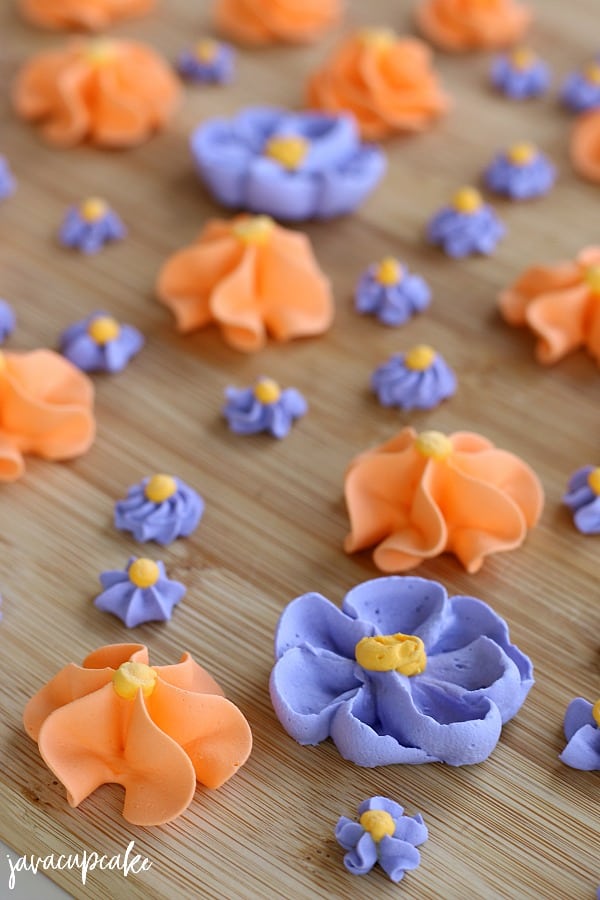
- Let the flowers set out overnight to dry. Store them in an airtight container, and they'll keep for up to a year.
The Fun Part: Experimenting with Tips!
One of the best things about making royal icing flowers is the endless possibilities for creativity and personalization!
Whether you're a beginner or a seasoned pro, there's always room to experiment with different tips and techniques.
Here are a few ideas to get you started:
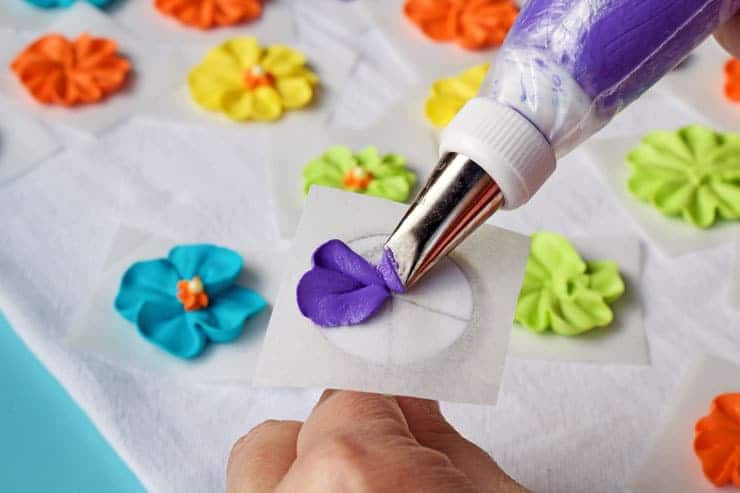
- Use different-sized tips to create different flower shapes, such as roses, daisies, and lilies
- Experiment with petal tips, star tips, and round tips to create unique and beautiful flowers
- Use a flower nail to make large, intricate flowers
- Try using different techniques to create other effects, such as swirling the icing or lifting it up as you pipe
- Mix and match different colors of icing to create a colorful bouquet
So why not get creative and try out a few new techniques? With royal icing, the possibilities are truly endless!
FAQs on Royal Icing Flowers
We've answered a few frequently asked questions to make sure your flower-making journey is smooth sailing:
- Can I use any substitutions for dietary purposes?
Unfortunately, we haven't tried any substitutions with this recipe. Still, there are many alternative recipes available online that you can explore.
- My flowers are still wet after drying overnight. What do I do?
Don't worry; it might just be the humidity in your area. Let a fan blow on your flowers, or try using less liquid in your icing recipe next time. - Will the flowers soften when I put them on a cake or any other surface?
Nope! They'll stay hard and beautiful, just like the first day you made them.
More Decorating Ideas to Try
These creative ideas will take your royal icing flower-making skills to the next level!
Whether you're looking to mix things up or add a touch of tropical charm, there's something for everyone.
Here are just a few of our favorite ways to decorate with royal icing:
- Mix and match different colors of icing to create a colorful bouquet
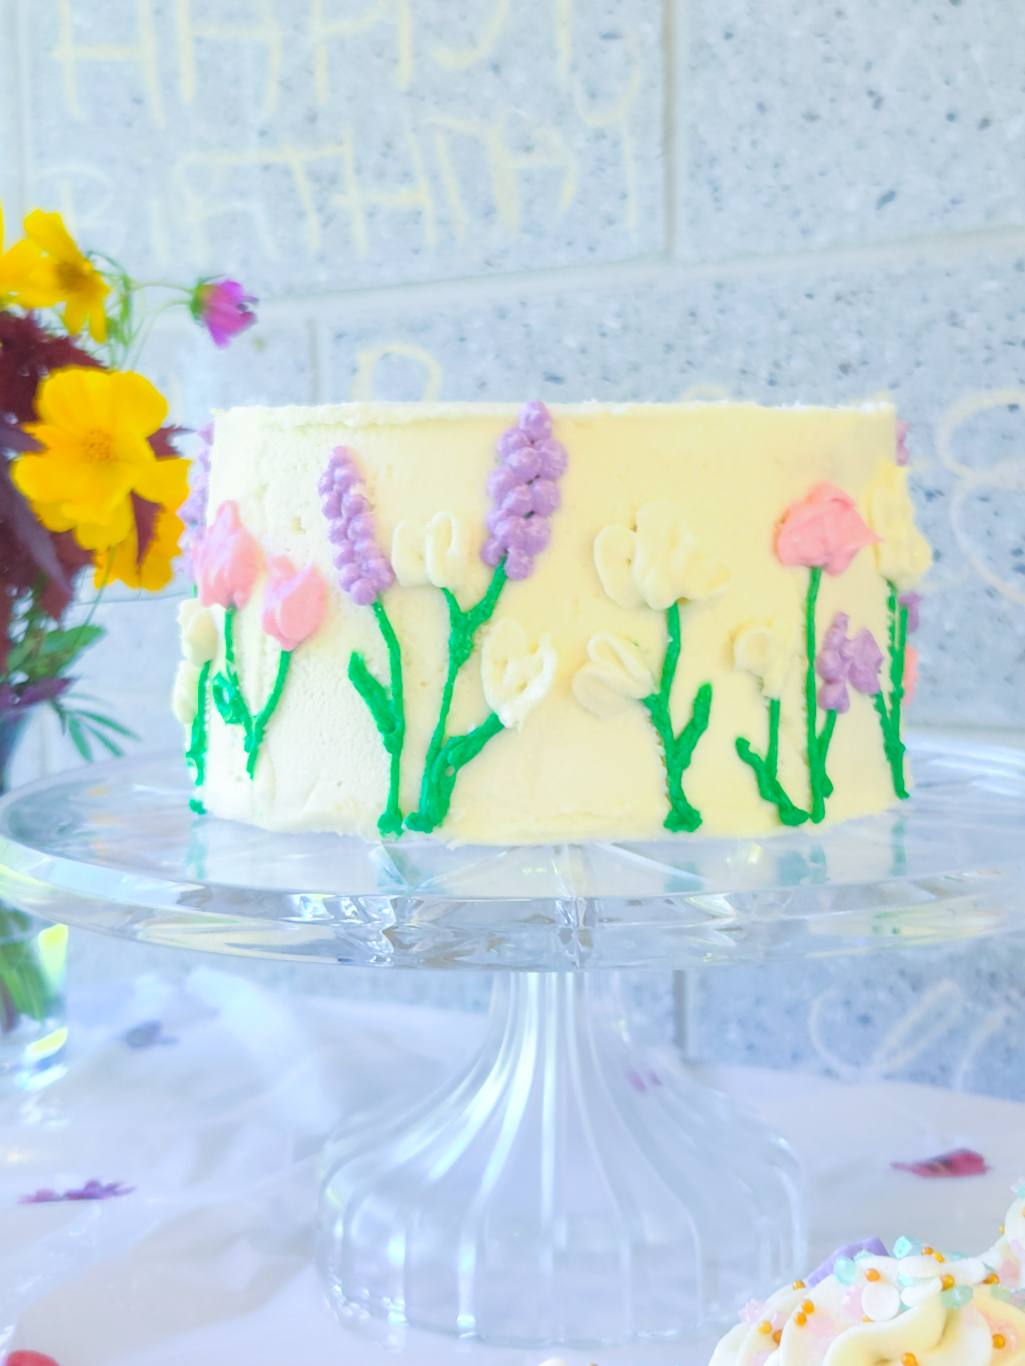
- Use the icing to create patterns and designs on the sides of your cake
- Create royal icing leaves to accompany your flowers
- Try making buttercream succulents for a fun and tropical twist on flower decoration
- Check out rose-shaped cookies by the fantastic blogger I am Baker for a more challenging project.
So why not grab your piping bags and get started?
With these fun and creative ideas, the possibilities for your royal icing flowers are endless!
Royal Icing Flowers
Royal Icing Recipe for piping beautiful Sugar Flowers. You can use it to decorate cakes, cupcakes, cookies, whatever you can dream of!
Ingredients
- 4 cups powdered sugar
- 3 tablespoon meringue powder
- 6-9 tablespoon room temperature water
- Wilton gel coloring (yellow for center of flowers + any other colors you want)
Instructions
- In the bowl of your stand mixer with the whisk attachment, combine the powdered sugar and meringue powder. Mix on low for 30 seconds.
- Add 6 tablespoon of the water to the sugar and mix on low until it becomes clumpy and all the sugar is wet.
- ½ a tablespoon at a time, add water until the mixture becomes smooth. GO SLOW and be sure not to add too much water. You want a stiff frosting. I added about 2 tablespoon more water at this point, but depending on the temperature and humidity of where you're at, you may need less or more water.
- Beat on high for 7 minutes. Lift the whisk out, scrape the sides of the bowl and test the texture and consistency of the royal icing. You want a thick icing - but not so thick that you can't push it through a piping bag & tip. Add ½ tablespoon of water if necessary to loosen it up.
- Beat on high for 2 more minutes.
- Separate icing into the # of bowls you are coloring. For example, if you are making pink and purple flowers, you'll need three bowls of icing. Two for the flowers and one for the center dots in yellow.
- Using a toothpick, add a very small dollop of gel coloring into each bowl and mix in with a spoon until uniform in color.
Notes
I watched these videos before I made this royal icing to help familiarize myself with the technique.
Royal Icing Basics: http://youtu.be/ux5hfEn2o7Q
How to make Royal Icing: http://youtu.be/RnxHBne-uVo

I've sat them out for over a day. And the underneath are still wet and stuck to the wax paper what am i doing wrong? And how to store them to keep them from breaking?
How is the humidity in your area? That could be the culprit!
High humidity I'm in ga
I'd suggest using less liquid in the mixture and possibly put a fan blowing gently on the flowers to help them dry. I'd give them a little more time with the batch you just made... I'm certain they'll harden! 🙂
PS... once they are completely hard, they will store easily in the same container. I had mine for several weeks/months in a tupperware container all stacked up and as long as I was gentle with them, they were fine. If you're worried about breaking, I'd line a piece of wax paper between layers.
I need help tRYING TO MAKE "BLUEBONNET FLOWERS TO PUT ON MINI CUPCAKES??
Hi Eliz... I'm not sure what you are asking for. Can you be more specific with the help you need? Thanks!
Pls can l substitude with egg white
After being hard will they soften up when used on a cake?
Nope!
Do you have recipe using egg whites?
Hi! Can I make this ahead of time and use to make the flowers later? If so, do you have any storage tips, or know how long it will keep?
Thank you!
This is a great recipe. I have started making it last night and was able to make intricate icing details. I am so impressed I found this recipe.
great recipe! I needed flowers for unicorn cupcakes and this recipe worked perfect. I was able to use several different tips to make various sizes and shapes. Thank you for sharing!! The flowers hardened overnight. I did only add an additional 1.5 Tbsp in step 3. It piped beautifully and it was fun to play with the tips and try different shapes.
I like royal icing flower 🌹🌹🌹
Hi there! I read in this post that the royal icing will not soften once put on buttercream, but will the transfers also be okay on a cake/cupcake that has to be in a fridge overnight, or will that ruin the royal icing transfer?
Devon - great question. I have not personally tried this - however, since buttercream has liquid in it and isn't a solid - I fear putting the flowers on the buttercream overnight may cause the colors to run. However, since you're chilling them in the fridge - you'll probably have less of an issue than if you left them out at room temperature. Honestly - do a test run and see how it goes. Sorry I don't have a better answer!