
Princess Pull-Apart Cupcake Cake
This pull-apart cupcake cake is perfect for the princess loving kid in your life!
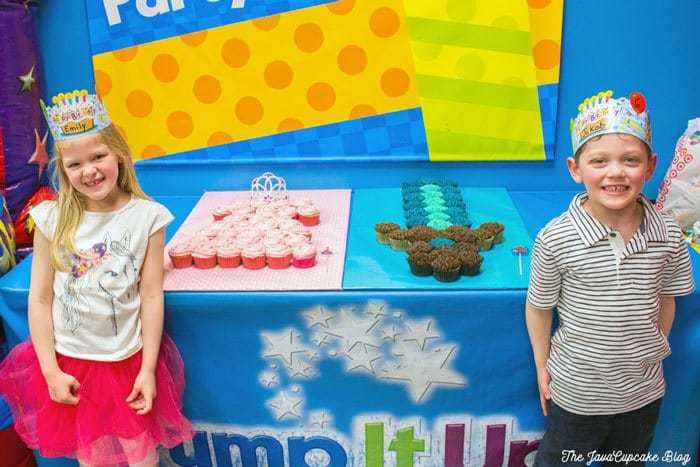
My friend Amy has twins who needed cakes for their joint birthday party. Emily and Jakob requested cakes for their birthday this year, but their party was being held at a local bouncy gym. When Amy asked me to help her figure out the cake situation, I suggested cupcake cakes!

Typically, I'm not a fan of these types of cakes. The grocery stores sell them and typically smear frosting over the top of a dozen cupcakes and call it good. I did not want these cakes to look like that. Cupcakes are perfect for parties because they are already portioned out sizes and no cutting or plates are needed!
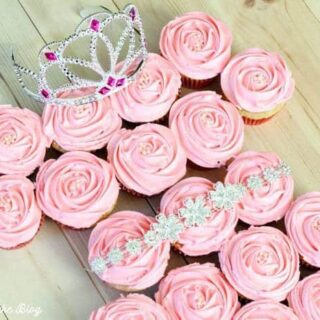
For Emily's cake, we decided on a princess theme. We found a few photos online that were on inspiration and went from there! These cupcakes can be made in any flavor, but the frosting should be a white based frosting so that it can be dyed pink or whatever color princess dress your little one wants.
Princess pull-apart cupcake cake
Supplies
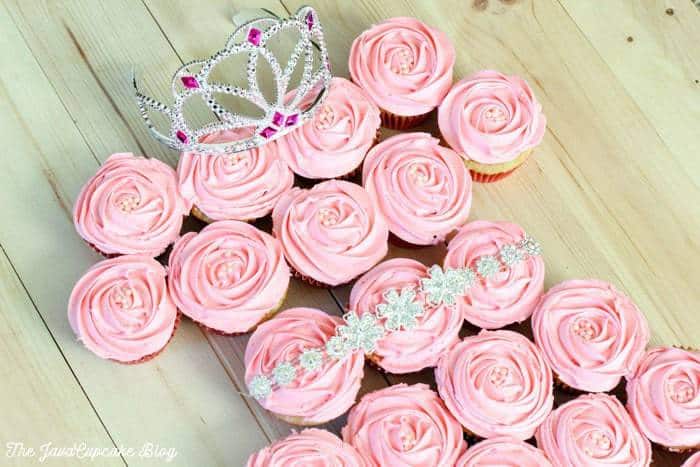
- 32 cupcakes baked in Sweets & Treats Boutique grease-proof pink cupcake liners
- Buttercream (see recipe below)
- Wilton 610-256 Icing Gel, 1-Ounce, Pink
Wilton Pink Sugar Pearls
- Crystal sliders (like these from Michael's) for the belt.
- Tiara
- Wilton 331422 Decorating Tip-No. 1M Star
- Wilton 2104-1358 Disposable 12-inch Decorating Bags, 24 Pack
- Foam core board 22x28in (like this one Pacon® Foam Board, 22" X 28")
- Wrapping paper (any color to match the cupcakes & theme of the party)
- Scissors & tape
- Tweezers & toothpicks
Assembly
- Cover the foam board with the wrapping paper making a smooth, clean surface to place the cupcakes on.
- Make the buttercream frosting and tint it to the color you want. (See recipe below)
- Fit 1M piping tip onto the piping bag and fill with buttercream.
- Pipe a swirl onto the cupcake creating a rose shape. To do this, do not lift the piping bag when swirling the frosting, leave it flush to the surface of the cupcake. Lindsay Ann Bakes has a great video tutorial for this technique!
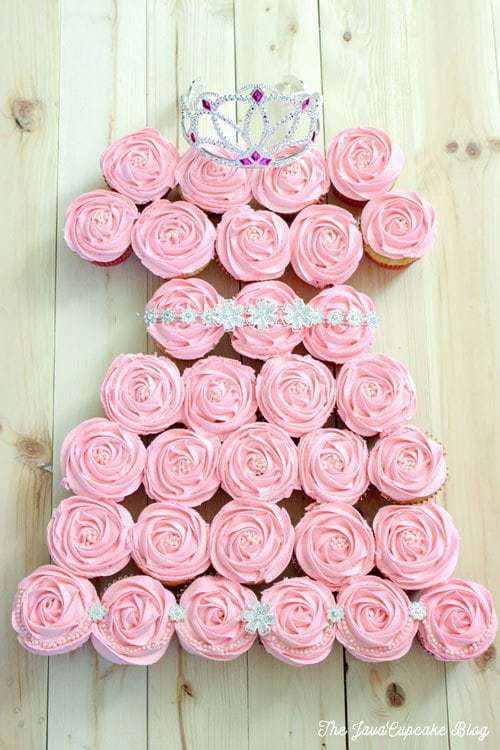
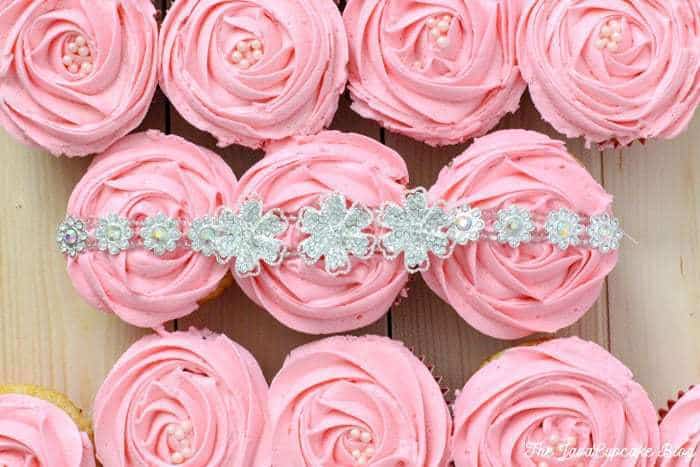
- Using this photo as a guide, begin arranging the frosted cupcakes onto the covered board. Place a pea sized amount of frosting to the bottom of the cupcake to act as "glue" before place it on the board. Doing this will make sure your cupcakes don't roll around if you need to transport the cupcake cake.
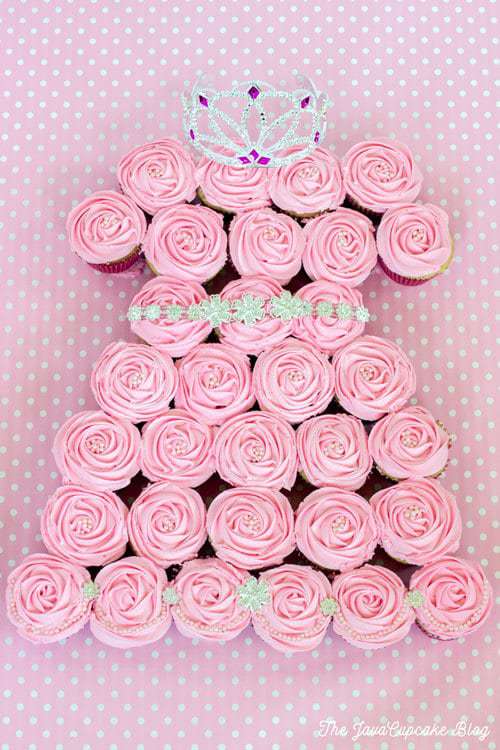
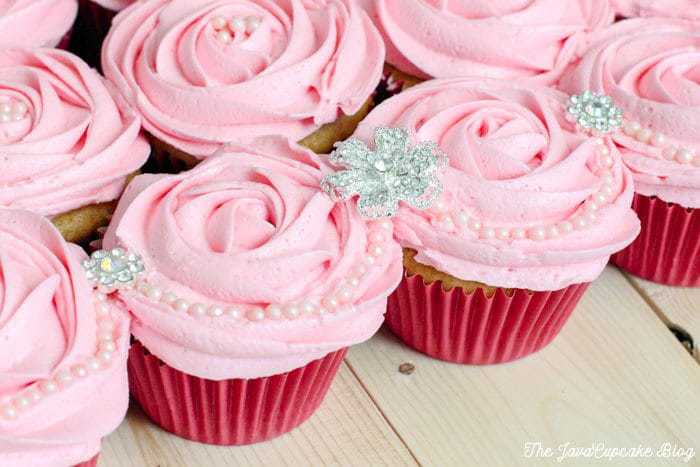
- Using tweezers, place the sugar pearls in a swooping pattern on the bottom row of the cupcakes. This will create a pretty trim on the bottom of the princess cake. Optionally, you can add 5-6 pearls to the center of each cupcake.
- For the belt, I chose two types of crystal sliders from the craft store. The first was a set of 4 large flowers and was 3 sets of smaller flowers. I attached three of the large flowers together and added a strand of four smaller flowers to each side. This made the belt long enough to cross the "waist" of the dress.
- If you have any crystal flowers remaining, use them to decorate the base row of cupcakes creating beautiful embellishments like on a bottom of a dress.
- Finally, place the tiara at the top of the cake.
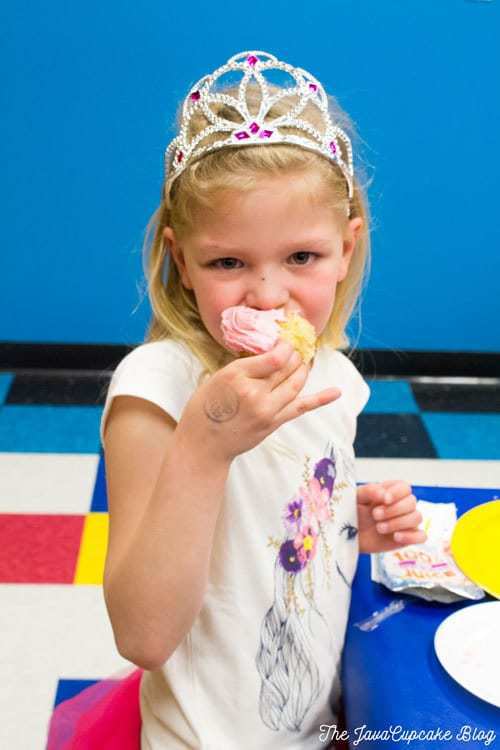
- Serve and enjoy!
Coming next week... Jakob's Minecraft sword pull-apart cake!
Princess Pull-Apart Cupcake Cake
Ingredients
Crustable Buttercream
- ½ cup unsalted butter, room temperature
- ¼ cup shortening (I used Crisco)
- 1 lb powdered sugar
- 1 tablespoon vanilla extract
- pinch of salt
- ¼ cup heavy whipping cream
Instructions
- In your stand mixer, whip together the butter and shortening until combined.
- Add the vanilla, salt, and powdered sugar and mix until incorporated.
- Scrape the sides of the bowl and add the heavy cream. Whip until smooth.
- If the frosting is too thick, add 1 tablespoon more cream until you reach your desired consistency.
- Add a dollop of pink gel and whip until combined. Add more to reach the color you want.
- Whip on high for 2-3 minutes or until light and fluffy.


This is an absolutely darling party for the little princess. Clever ideas that are original so thanks very much.
OH MY WORD THIS IS ADORABLE!
Those are adorable!
So much better than the grocery store version! So cute and perfect for a little girls party!
Nailed it! This is just perfect for a little girl's party!
What a gorgeous little princess!
And... THIS is how I want to celebrate MY birthday, too!!! 😀
Beautiful cupcakes perfect for a little princess' party! 😀
This is adorable! I just love those crystal flowers, and the icing looks perfect!
This is seriously SUCH a cute idea! I've never made pull-apart cupcakes but I have to try this!
how do I transport this cake once complete? I can't find a box big enough to carry the posterboard - any suggestions would be most welcome! thanks
To be honest, there is no easy way. The board I had mine on was rigid, so I transported it on that. I covered the entire thing with plastic wrap so nothing got on it... then sat it in the back of my SUV on the floor. Drove slow around corners! Good luck!
Such a beautiful dessert for this time of year!