
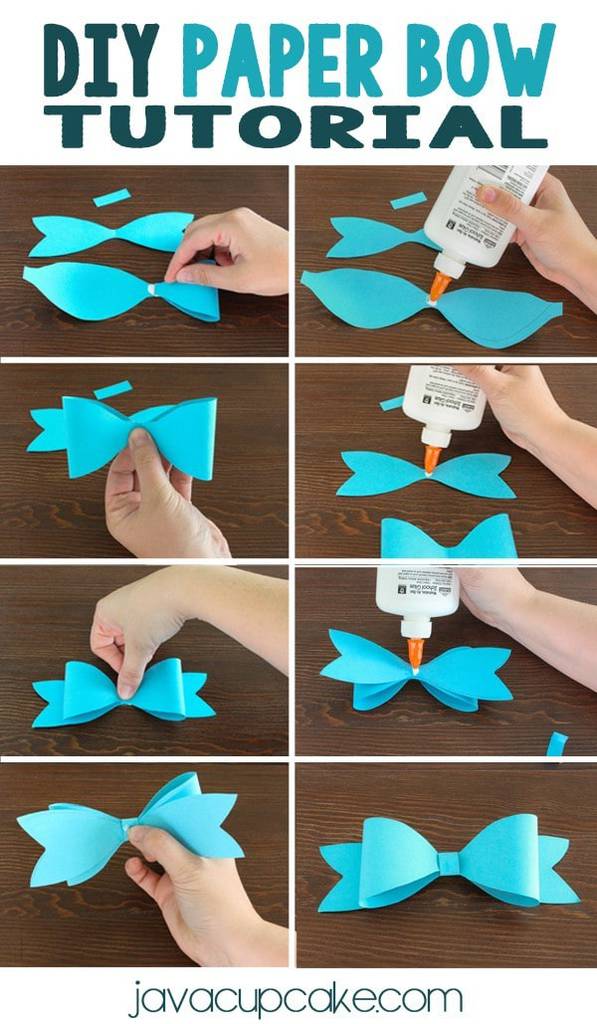
DIY Paper Bows
Paper Bows add flair and charm to gift wrapping and create a fun touch in home decor. Use this simple tutorial to create one-of-a-kind DIY Paper Bows! 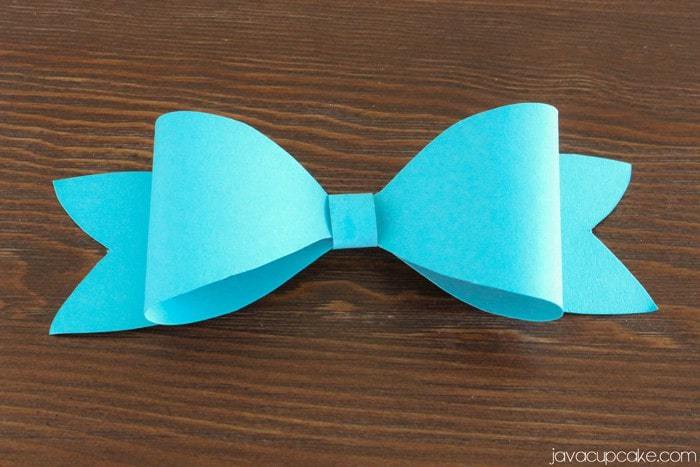
I love giving the gift of baked goods to friends and family. Since I take so much time and care into making sure what I'm gifting is perfect, I really want to make sure the outside is beautiful too! These DIY Paper Bows can dress up any gift with just a few supplies and simple steps. Any color paper can be used which makes them so versatile!
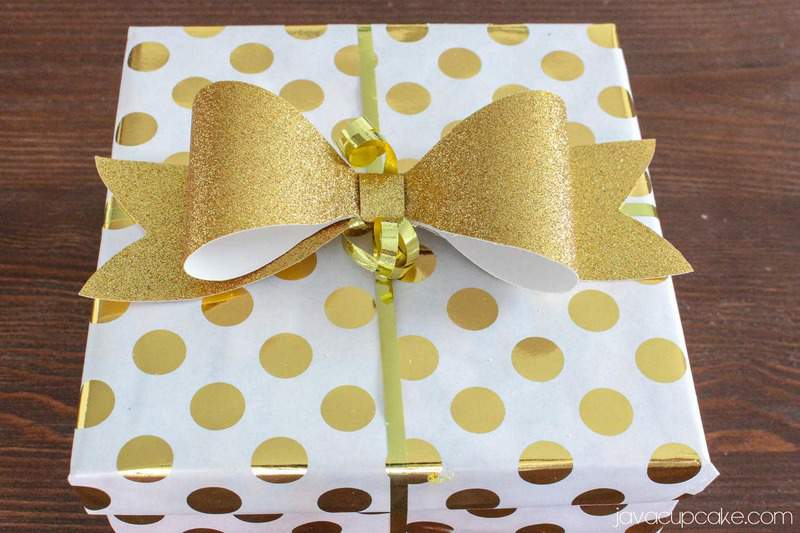
See how amazing this package looks with the addition of a gold paper bow? It's super easy, you just need a few supplies and about 5-10 minutes to make your own!
Supplies:
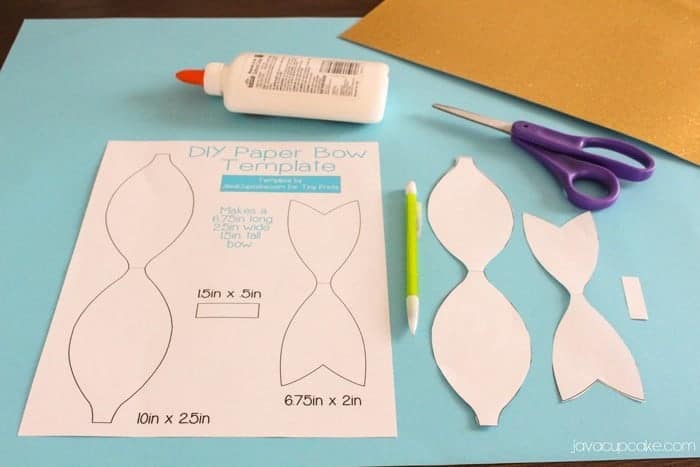
Here's what you'll need...
- Thick card stock paper
- DIY Paper Bow Template (download here)
- Scissors
- Glue
- Pencil
Instructions:
- Cut out the pattern from the template.
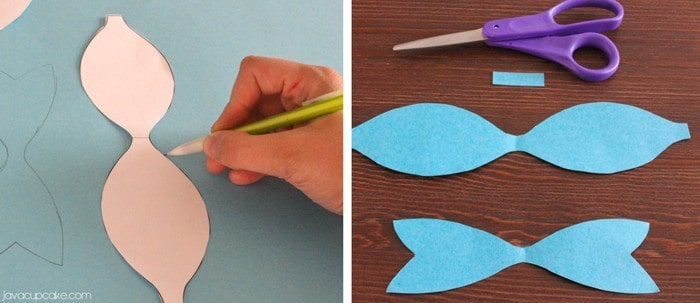
- Trace each piece on to the card stock.
- Cut out each piece of the pattern.
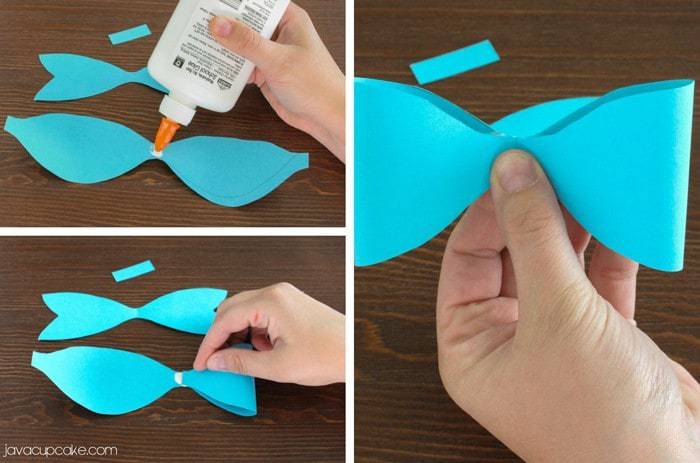
- Squeeze a dollop of glue onto the center of the largest piece.
- Fold over each end until it meets at the glue in the middle.
- Using your fingers, hold the ends together until the glue has dried and it doesn't fall apart. (If you want to make more than one at a time, you can secure them with a paper clip and set aside to dry while you work on more)
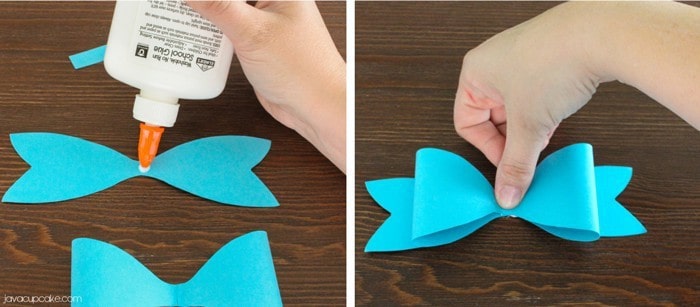
- Squeeze a dollop of glue onto the center of the other large piece.
- Press the folded bow down onto the glue and hold until it dries and doesn't come apart and is dry. (Again, if you're making several, secure with a paper clip and make more while it dries.)
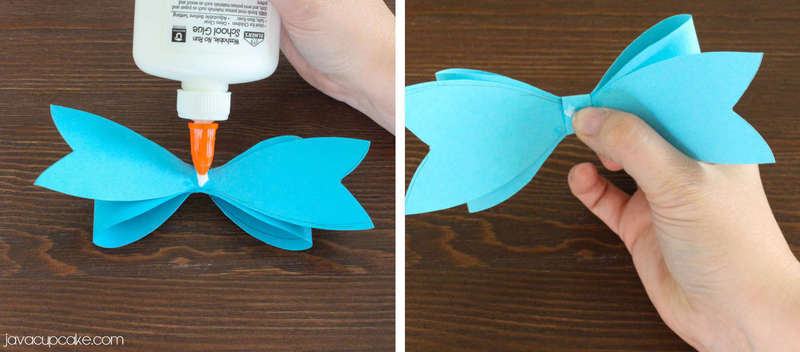
- Flip the bow over and squeeze a dollop on the center.
- Wrap the smallest piece around the center of the bow until it meets at the glue.
- Press gently and hold until it dries.
Coming Wednesday I'll be sharing a complete tutorial to create an entire gift wrap presentation with the DIY Paper Bow as the star!!!


Great idea. would love to see more gift bows am obsessed with them