

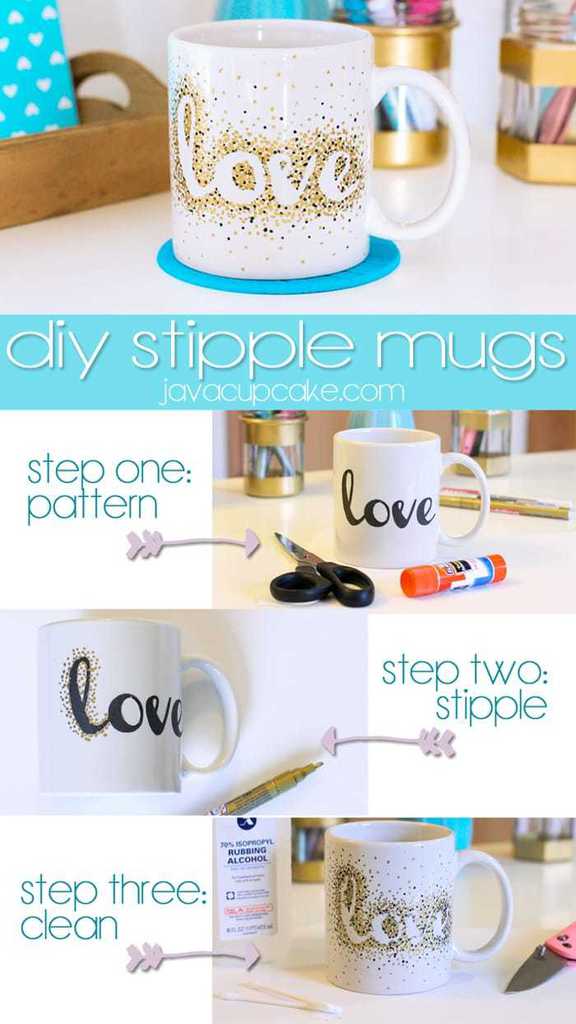
DIY Stipple Mugs
Last year, I saw pictures on Instagram of a blogging convention where they had mugs on the table and permanent markers for people to decorate them with. I thought this idea was genius and started searching Pinterest for more ideas. Who knew that DIY Stipple Mugs were actually a thing! A big thing!
Seems like most DIY bloggers have a stipple mug tutorial on their blog and they all pretty much read the same. Scrapbooking stickers, sharpies, etc etc etc. Well, I don't really have access to a lot of scrapbooking supplies and I knew I didn't want to use a shaprie... so hey, I'll figure it out on my own and blog my way!
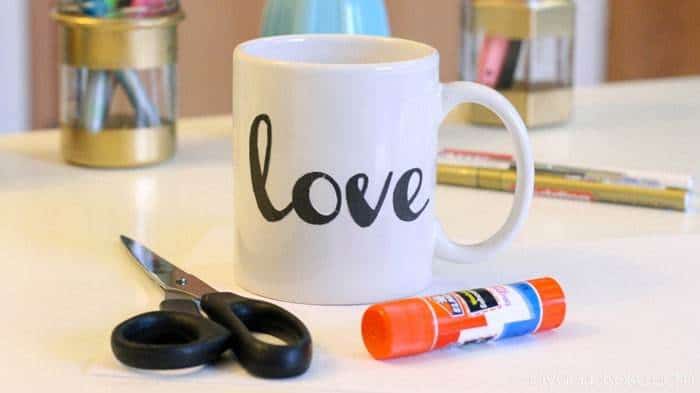
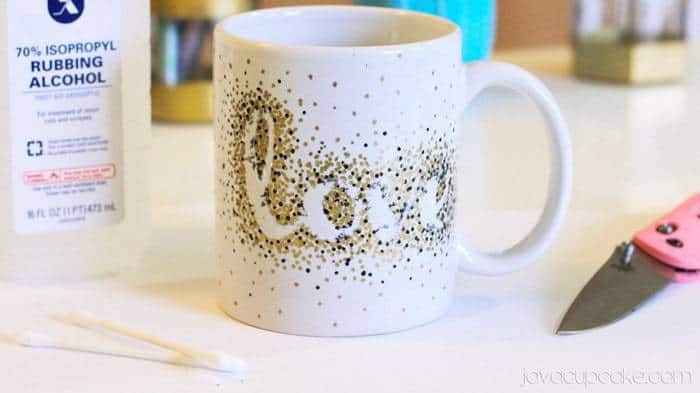
In Photoshop, I made a template for the word "love" in a font I adore. I printed and cut it out but because it wasn't a sticker, I had to figure out a non permanent way to attach it to the mug long enough for me to stipple around. A glue stick! YES! I have kids, so naturally I had some around the house and what's even better, it's the washable kind. The washable glue sticks are made to be washed away when not wanted anymore which means I'd be able to clean it off the mug easily!
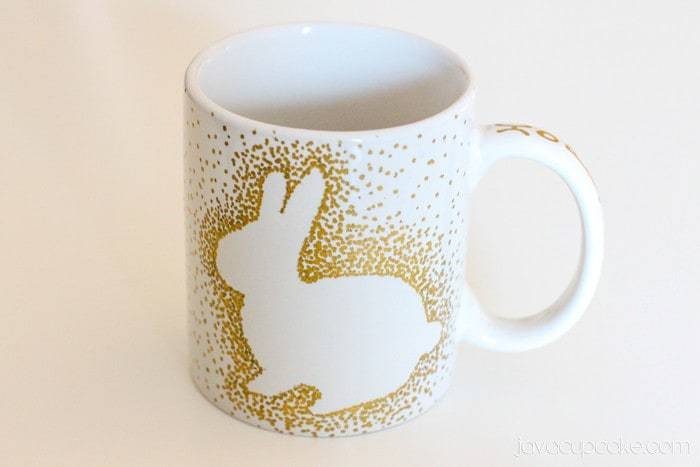
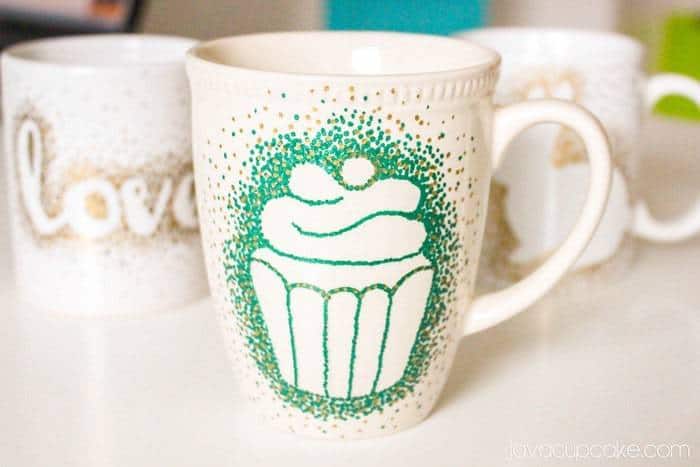
So, with the technique down I got to stippling! Turns out... I'm kind of addicted to it. Since I started, I've made three mugs with a fourth in the works!
Templates
Here are the templates I used for these mugs. Click on them to download then print.
Supplies
- White, cream or light colored mugs
- Patterns
- Scissors
- Paint markers 1-2 mm made for glass, metal, plastic & paper (I purchased my paint markers at the Müller in Weiden, Germany. I am certain you can pick them up at any craft store.)
- Washable glue sticks
- Rubbing alcohol
- Q-tips and cotton balls
- Sharp knife or or blade
- Oven
Directions
- Cut out your pattern then position it on the mug how you want it.
- Lightly spread the glue over the edge only of the back of the pattern then gently place it into position on the mug. Gently press along the edges to position the pattern into place.
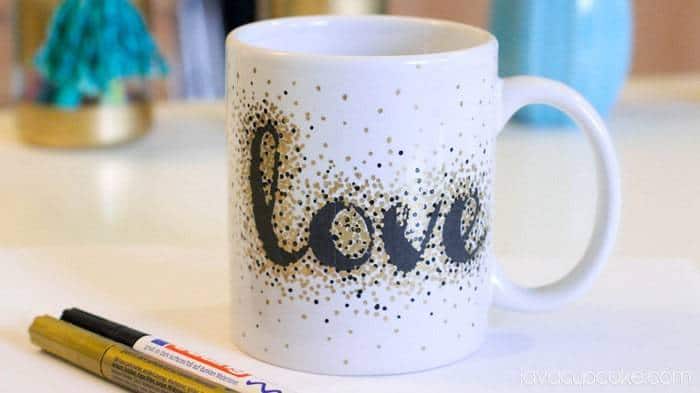
- Using the gold paint marker, gently press dots of paint along the outside edge of the pattern. Working around the edge, create about a 1 cm border of stippling that is close together. As you work further away from the pattern, the dots will increase in distance from one another. Continue working out from the original 1 cm border until the front of the mug is covered in dots. The further from the pattern you go, the further apart the dots will be.

- Once you have a look you like with the gold paint, you can either finish or add an accent color. With the "love" mug, I used black. With the black paint marker, start closest to the pattern and apply a few dots, closer together to begin and further apart as you reach the edges of the mug. Allow the paint to sit for 2-3 minutes before you move on to the next step.
- Using the knife, gently lift the pattern from the mug. Using the sharp edge of the knife, scrap away any paper or glue that is remaining. Dip a q-tip in the alcohol and gently rub where the pattern was to remove any unwanted residue from the pattern. Wipe dry with the cotton ball. Repeat as necessary until the mug is clean.
- Go back with the gold, then accent paint markers and fill in any holes along the edge where the pattern was.
- Take a few steps back from your mug and see how it looks from a distance. Fill in any places you think need a few more stipples. Don't over do it.... less is more with this project!
- Allow the paint to dry for 21 days before using. Hand wash only.
- Alternately, you can oven cure the paint. Place the mugs on a baking sheet and put them in the oven. Turn the oven on to 350F degrees and bake for 30 minutes. Turn the oven off and leave the mugs in the oven until they cool completely. Hand wash only.
Isn't this just an awesome project? The possibilities are endless! Any color, any pattern for any occasion! Just use your imagination and create!
Happy Crafting!


so pretty!!!!
I've been meaning to do this myself but had a hard time figuring out what to use to stick my templates on. GOtta get a glue stick now!
Yes! The washable purple glue stick is what I used. Rubbed right off with a little rubbing alcohol after the paint had a chance to dry!
Hi, curious what font and size you used for "love"
I think these pair great with cake! Love it. <3
I couldn't agree more, Jessie!! xxoo